
A Favorite Christmas Fold
Which do you like best?
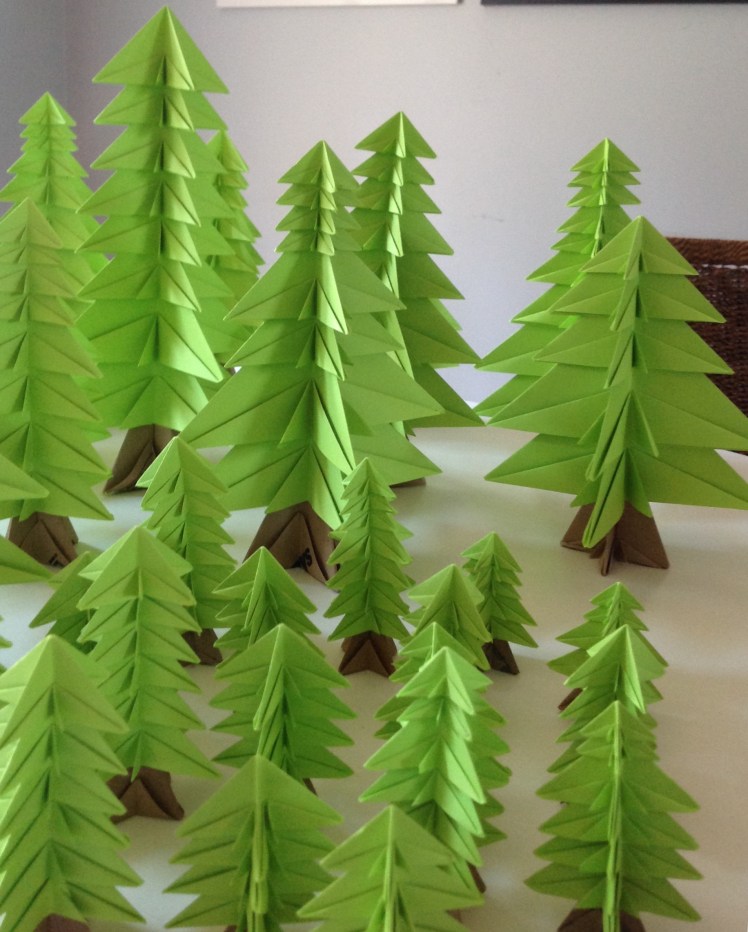
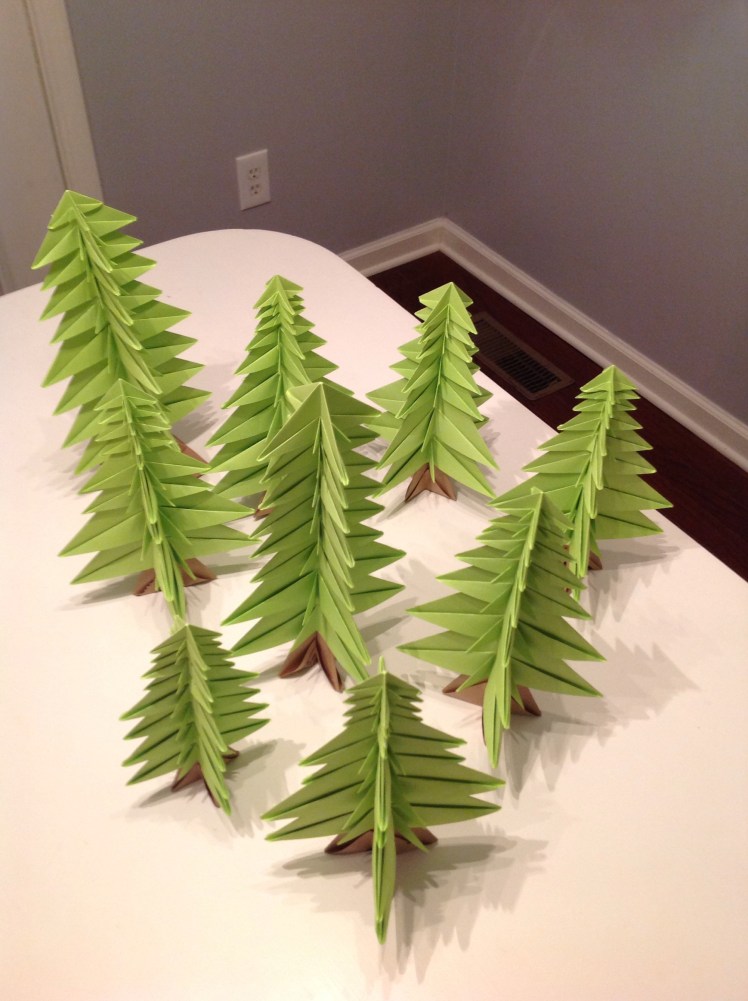
One of my favorite folds is the Origami Christmas Tree. I love to make these every year to give away and to put on the mantle to create a small forest of trees. I have often used them while giving a devotional about the true meaning of Christmas in which I describe how the tree relates to the first coming of Christ. He actually came to die on a tree for our sins. The Bible has a lot of other things to tell us about trees as well. Check it out.
An Easy Fold
This project is actually quite easy if you take the time to make your creases heavy and carefully.
Let’s Start!
You start with an inverted water balloon base.

To make it you fold an X on one side of the paper, then turn it over and fold a cross in the center of the paper. Interestingly the “X” is the second letter in the Ichthus which is the symbol of Christianity. IXOYE in Greek means, “Jesus Christ God’s Son Savior”. When people write X-mas is isn’t necessarily to remove Christ from Christmas since the “X” means “Christ”.
Start With Several Squares of Paper
In order to form a symmetrical tree you need to start with several squares: large to small. You can make as many layers as you like. The more you have the taller the tree.
How to Make the Tree Base
Using the Inverted Water Balloon base you next squash it flat with the open side down.

Fold Up Each of the Four Points on the Bottom


Next We Will Create the Smaller Branches
You can already see the basic tree form in the previous fold. To enhance the look we will create four smaller branches in between the four larger ones. Flatten the base and fold the top layer both to the right and to the left as shown below. This will create a “rabbit ear” fold.


This Will Do In a Pinch!
To create the small branch all you have to do is pinch it out like this:

Repeat this process on all four sides and then use your fingers to squeeze the form into the shape of the tree again so it looks like this:

Start Large and Work Down
Next, take your largest unit and place it on the bottom. Take the next largest one (or one of the same size, if you have made two or three of each size), and continue to add them as you go up. In order to hold them in place you put 8 tiny drops of glue on each surface at the top. Don’t use too much glue! A tiny drop will hold it and set more quickly than a big drop. Pinch the outside to get it to hold its position on top of the previous unit. Squeeze and hold and the glue will set almost immediately. Continue to stack units to create your tree.
Start Your Own Forest


You can also make a trunk for your tree. Here are the directions for the trunk.
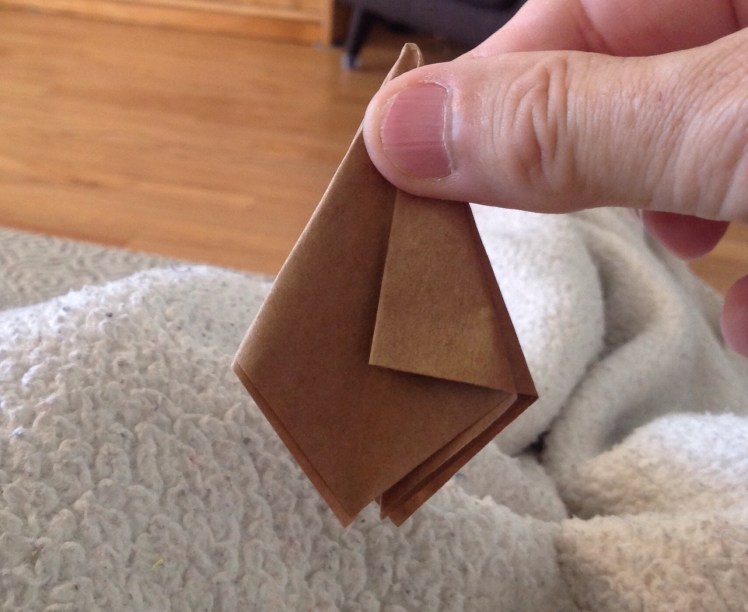
Use a square sheet of brown paper. I like to use recycled brown paper grocery bags. Fold the square just like you did for the tree portions up to this point.
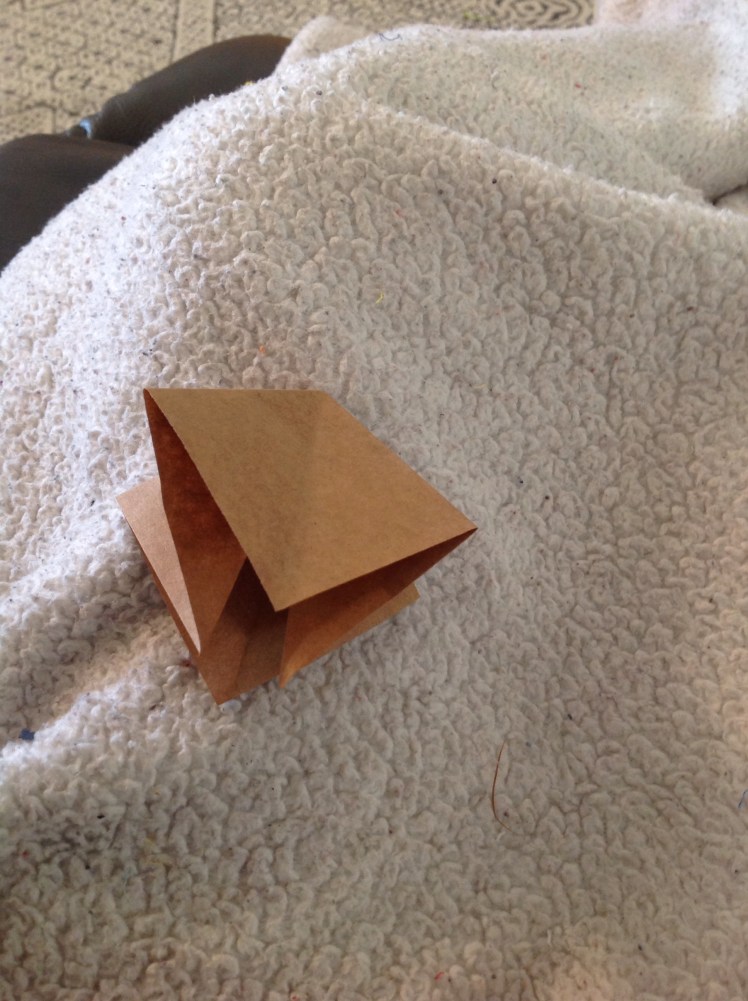
Now, fold the right hand diagonal side down so it meets in the middle.
Flip this flap to the left and repeat with the right side of the under level. Then flip the paper over and do the same on the back side so it looks like this:
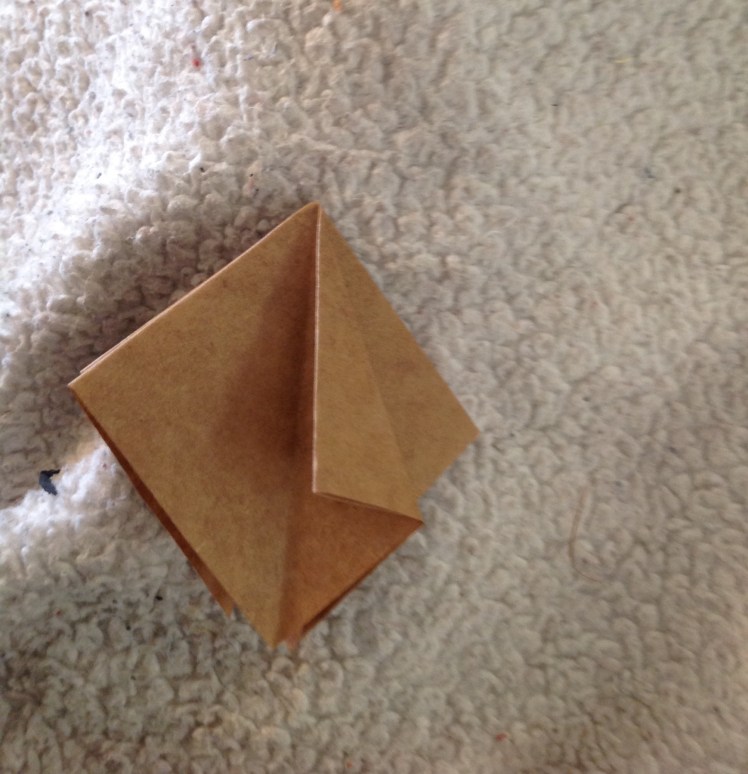
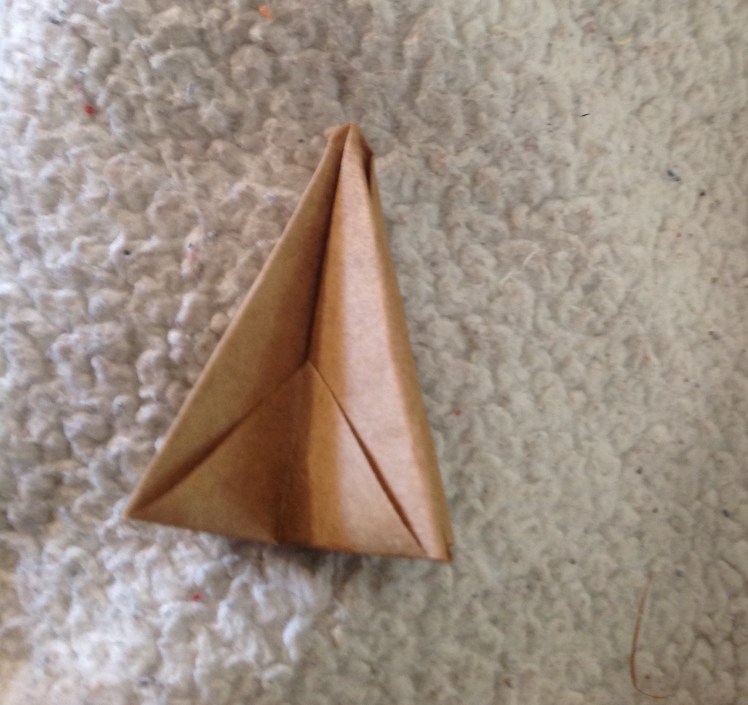
Now, to lock the trunk so it won’t come undone and to make the bottom flat, fold up the triangle portion at the bottom as shown below:

Repeat on all four sides to finish the trunk.
Now you only have to put a little glue on the top portion and insert it into the bottom of your tree and squeeze. Hold it until the glue dries and you have completed the whole tree.
Here Are Some Fun Ways to Use Them:
I often like to give trees away around the Christmas season. I once made several trees and gave them to a neighbor who took them to a hospital for the elderly and gave them out to the older patients who were not able to have a real tree in their rooms. They really enjoyed them. I made several for my daughter-in-law to use at a Christmas tea for women. She used them as center pieces and then let each lady take one home after the event. They make great center pieces for the table as well as fun decorations for the table top. I suppose you could add a string and make them into a mobile. How will you use them? Have fun and be creative. Remember that this is the season for giving so make a lot of them!


Here is another type of origami Christmas tree:


My son will love this! Thanks for sharing!
LikeLike