Go Ahead and Stick Your Neck Out!

One of the amazing creatures that God created gives strong evidence of design. In order for this animal to exist it must have had all these design features in place when it was created or it would have quickly ceased to exist. Let’s take another look at the amazing design of the Giraffe. My wife and I enjoyed visiting the zoo and taking these pictures. I hope you enjoy them too!


Click below to access the Powerpoint presentation. You can also open it in Keynote, if you have that app.


the-giraffe-evidence-of-design


A Real Monster!

Are you afraid of monsters? Well, this creature should be respected for its potential danger. However, as in the rest of God’s creation, it has a purpose and has even been found to be more helpful than harmful to mankind. Do you know what it is?


Click below to open Powerpoint presentation. You can also open it in Keynote, if you have that app.

a-real-monster

World’s Longest Leaper

Who Spit On This Plant?

Technically, this is spit.Well,  It is bubbles in the saliva of a Spit Bug. These little guys are very interesting. If you look inside the bubbles you will find the little insect larva that generates all the bubbles.


Why Do They Do This?

That is the big question.  To find out the rest of the story you will have to open the following Powerpoint and read all about it.


When you think of animals that leap, what first comes to mind? Probably frogs, grasshoppers, and kangaroos. However, do you know which creature is considered the greatest leaper of all? Can you imagine a creature that can withstand many more times the G forces created by a launch than even mankind? Then you will enjoy learning about the Spitbug which grows up to become the Froghopper insect.

Click below to open the Powerpoint presentation. You can also open it in Keynote, if you have that app.

froghoppers

How Flexible Is Paper?

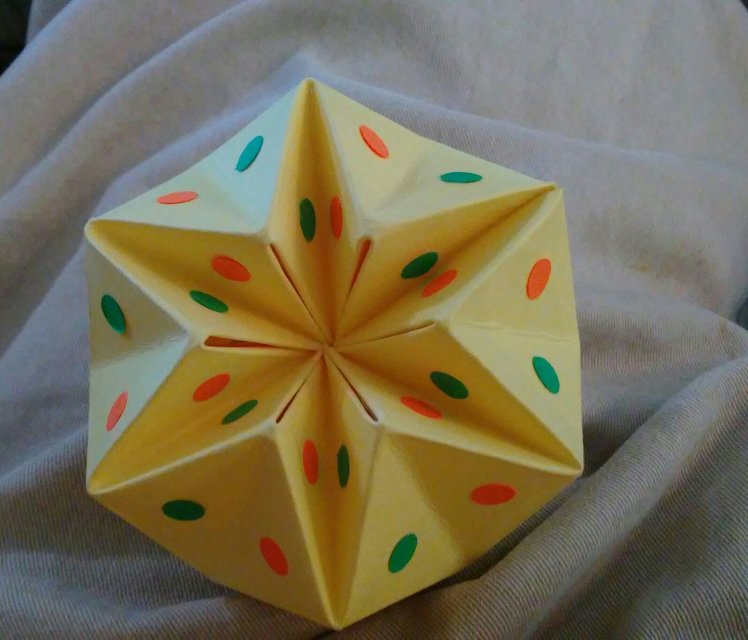
In my last origami post I showed you the weight bearing strength of paper. In this post I want to show you a fun fold I learned way back in my college days. This amazing fold creates a 3-D form that rotates on its axis. It is called a Hexaflexagon.

img_4252

The first time I made one of these it took hours to complete because the directions required you measure out the form, then line it for all the folds. After that, you had to score all the lines with a sharp knife. Only then could you fold it, squash it, and finally glue it together. After making several flexagrams the hard way, it dawned on me that it was simply a repeating pattern. Why not just fold it Origami style, since all the lines were straight? It’s just a series of diagonal and horizontal folds. I tried it and can now make one very quickly, with any sized paper, as long as it is just over three times its width, allowing for the glue tabs.

This is a rather complicated project the first time you do it. It usually takes two whole periods to teach junior high and high school students how to fold them. It’s much easier when someone is there showing you how in person. The following just tells you the basic steps of the process.

You begin by folding the paper diagonally to create the three original squares which form at the ends of the X folds. After that you divide each square into four horizontal folds. Next, you must fold the four corners of each square to the center of each square. At this time you can see the pattern all made up of triangles. You just need to find where the pattern is missing in your project and add the missing folds. Once this pattern is completed you will need to crease all of the horizontals into valley folds. Next, turn the paper over and fold all the diagonals with valley folds. The paper will start to curl up when you do this. Grab one end of the fold and squeeze the outside of the form, where you see little triangles, to the center with your fingers while compressing the form. Continue all the way to the end of the form until you have a tiny square, springlike form. Open it back up and cut the extra band of paper into the glue tabs. Add glue to the top of the glue tabs and insert them into the inside of the form one at a time. Squeeze it for about a minute to allow the glue to set. Rotate the form so that you can insert the second glue tab. Again hold it for a minute or so.

img_4254

img_4253

img_4264

img_4267

img_4266

img_4265

img_4248

img_4249

img_4263

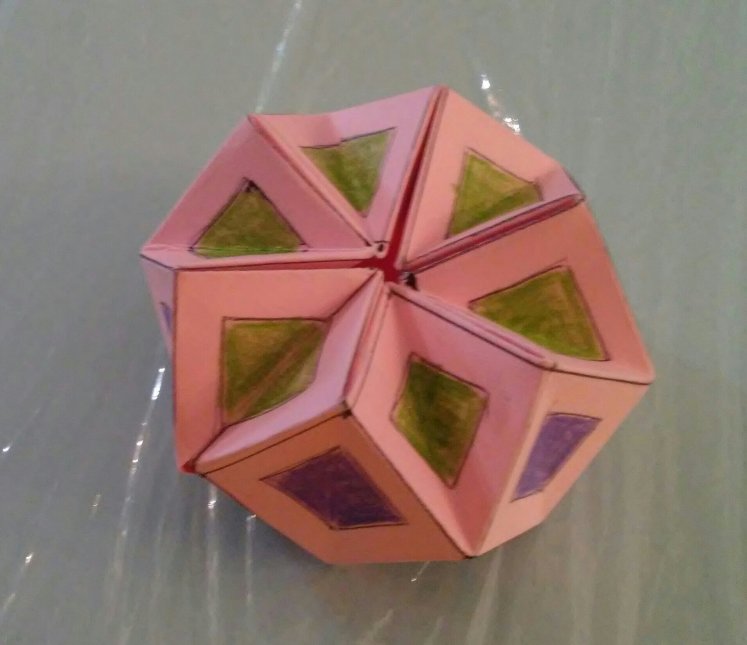
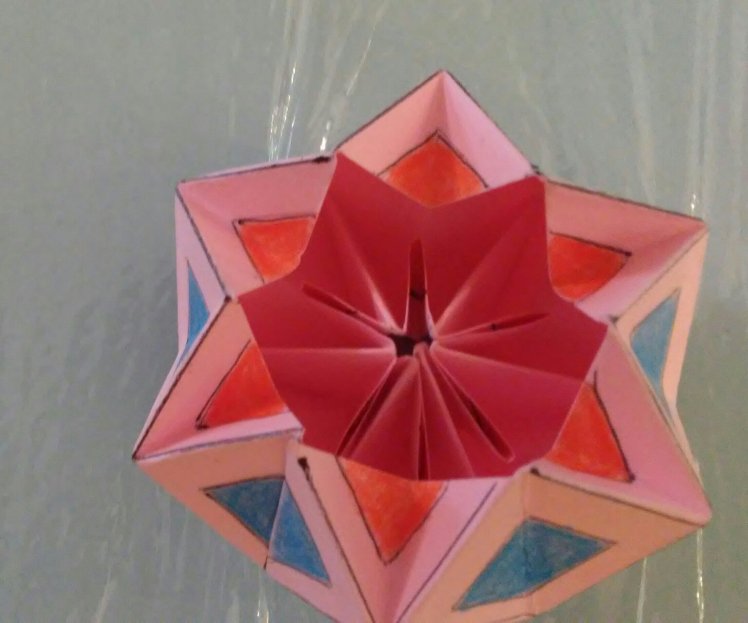
You have now made a hexaflexagram. To make it rotate you must pull on the outer edges while pressing the center in. It will rotate one facet at a time. Be sure to always keep the center tightly together as you rotate it or the glue tabs may fail. After you have tried rotating it a couple times it will be easier.

Some people think this form is a good model of a black hole. One that takes you through its center to another dimension. Others liken it to a flying saucer, complete with landing gear. The saucer closes up to travel through space yet can rotate to open its landing gear.

img_4268

If you make multiple units they stack and interlock like gears. Stack four on top of each other and bind together with rubber bands and you have a great indoor football to throw. I wouldn’t try kicking it though. It would probably break depending on how hard you kicked it.

img_4262

img_4261

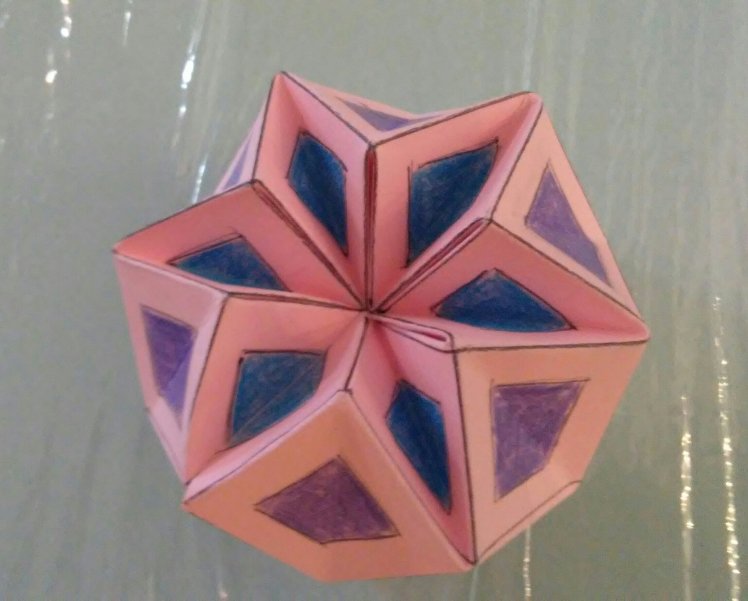
Another fun way to use them is to create 3D greeting cards by adding art to the surfaces. You can even make a progressive message that appears each time you rotate a new surface. I once won a contest with my Christmas card design created on the hexaflexagram base.

img_4268

img_4273

img_4272

img_4271

img_4270

img_4269

img_4274

img_4275

img_4276

img_4277

Interestingly, there are several other types of flexagrams. If you are interested in these, check out the M. C. Escher kaleidocycles. These flexagrams come in book form with cutout models. They are printed with Escher tessellations on the outside which make wonderful conversation and art pieces.

As you have seen in these pictures, the Hexaflexagram is amazingly flexible. It is also strong enough to support weight, much like the accordion pleat in the last post. I hope you have enjoyed learning about flexagram.

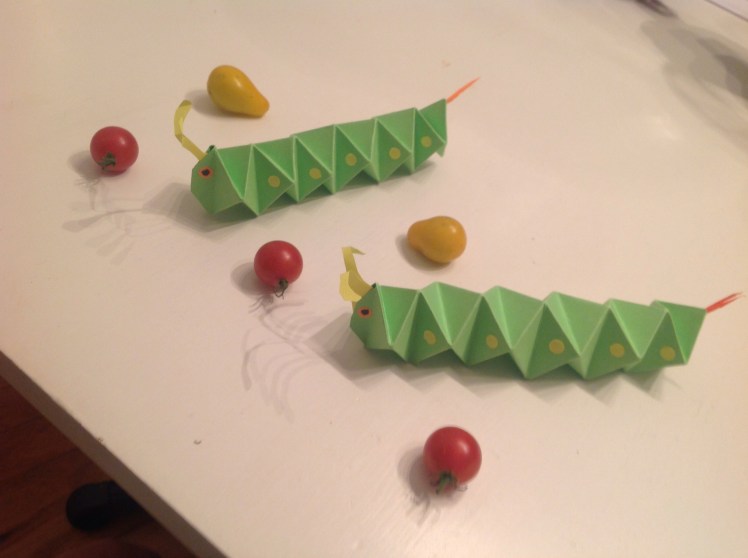
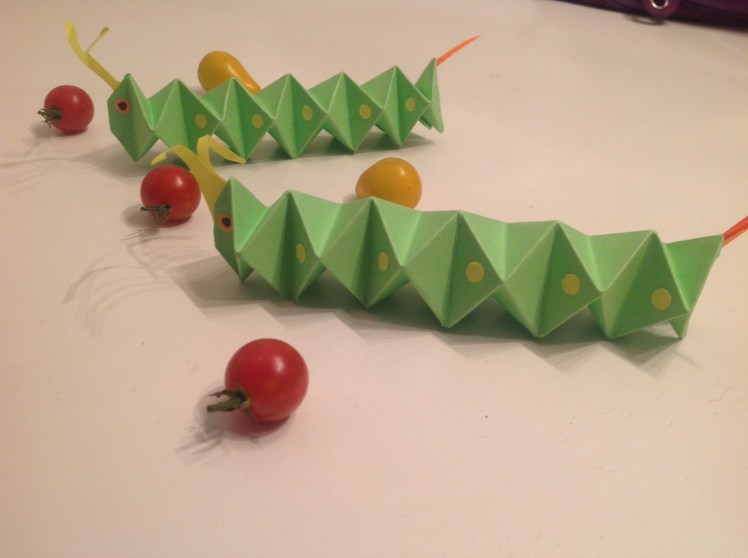
Make Some Caterpillars:

If you take your folded paper prior to gluing, add some antennae, eyes, spots and a tail, you can make a flexible caterpillar like these tomato worms. If you vary the colors and spots you can make several different kinds of larvae from many different species, they pair well with Origami butterflies.

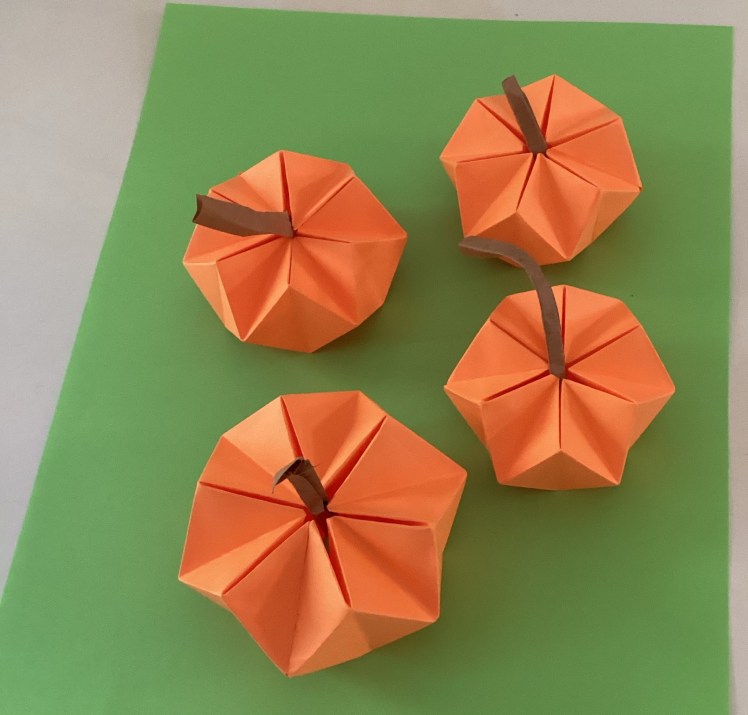
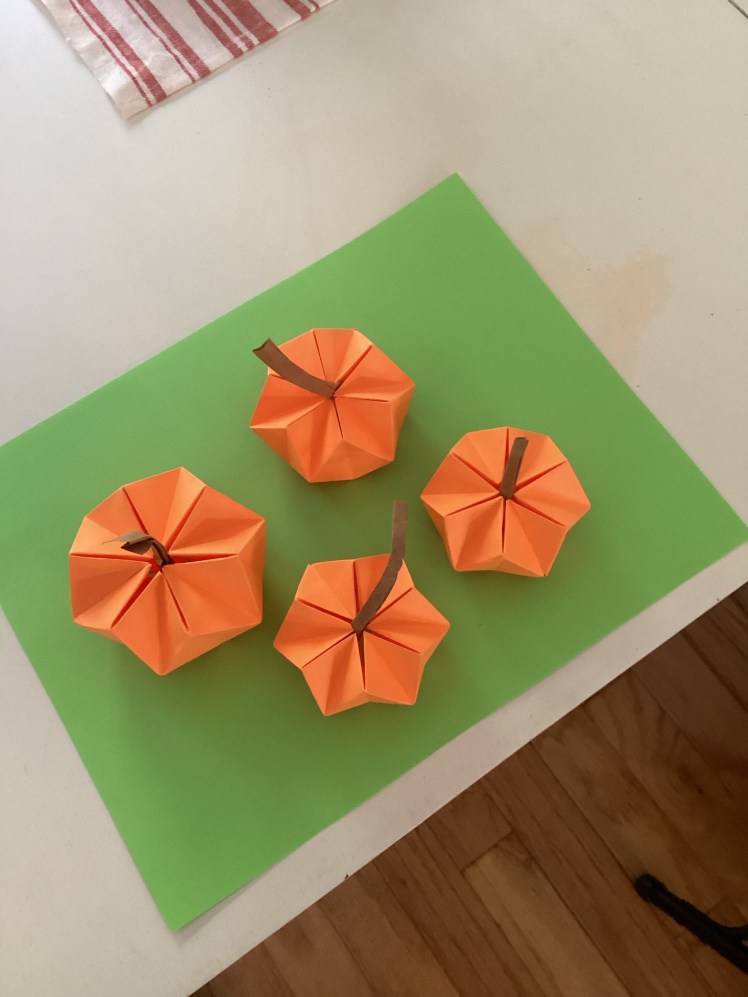
You can also make pumpkins.

Just use orange paper for the flexagrams and add a strip of brown paper for the stems, add a face with a Sharpie if you want to use it for a Halloween centerpiece.

Origami Lifting Power

I recently watched an amazing documentary on Nova about the engineering developments using the principles of origami folding. They gave examples in building designs, medicine, mechanics, aeronautics, architecture, outer space design, and so much more. As a hobby I have experimented with the power of a piece of paper in its weight bearing abilities. I thought you would enjoy seeing one example.


In this example I used two standard 3″x5″ cards folded with accordion pleats. How many books do you think one card can hold up?


img_4239 img_4240 img_4241 img_4242


Notice I placed two smaller books on the sides to prevent the paper from sliding outward. The cards still support the entire weight of the books.


img_4233 img_4233 img_4244


You can see that the larger books are resting on the cards and not the smaller books.


img_4246 img_4235 img_4235 img_4236 img_4238 img_4245 img_4243


In total, the cards were able to support the weight of seven large books. When weighed, that equals 10 lbs. Who would have thought a tiny 3″x5″ card could support so much weight?


When used in weight bearing applications the paper is sandwiched between an outer frame that keeps the sides from slipping out yet still allowing the internal paper to support the weight.

Keep your ears and eyes open to hear and see many of these origami principles being used in the news. More and more people are realizing that origami is not just a kid’s hobby. Did you know that many of the most famous scientists experimented with origami? Other notables were famous authors, musicians, magicians, doctors, architects, and more. Why not do a little research about the history of origami? It is very interesting.

Big Bird, Great Bird! The Blue Heron

One night while fishing for catfish, out on the end of the pier, I was startled by a huge bird landing right next to me. Not only was I startled, but the bird gave out a loud squawk when it realized it was not alone. The bird rustled its wings and gave flight rising like a large Pteradactyl. It flew just a short distance away and landed near the shore about 100 feet away. Throughout the night we both kept an eye on one another. Though I caught larger fish he was content to spear the shiner minnows swimming near the surface in the moonlight. He also caught a larger bluegill when it wandered too close chasing the shiners.The heron is a very patient fisherman. He stood in the shallow water on his long stilt-like legs. He kept his long neck in an S shape. By doing this he had a springlike reaction when he jabbed his spear, his long beak, into the water. Once he caught a fish he would often squeeze it several times in its beak while flipping it up to a point where it could swallow it.

img_4202  img_4204

These pictures were taken at my son’s house in Texas. He really captured the colors of these majestic birds well.


img_4203


I once lived on a ranch in Northern California near Clearlake. On the ranch we had two small ponds full of fish. The pond on the front of the property had hundreds of small catfish in it. I observed that the herons there were specialist in removing the organs from inside the fish. They left the rest of the spiny small fish on the shore for other creatures to feed on. I have never seen this behavior anywhere else. Usually they eat the whole fish in one big gulp.

Did you know these birds are about 4 feet high and have a wingspan of about 6 ft. They usually hunt alone by spreading out around the waterways where they feed. They do, however, enjoy nesting in large groups which adds extra protection by adding a lot of eyes to keep watch on potential threats to their eggs and young. Interestingly, the daddy herons gather the sticks for the nest building but leave the construction of the nest to the mother. The nests are huge and can be found in the tops of trees near the shore. Both parents help in feeding the young. The parents catch and eat fish and then regurgitate it for the babies so it is easier for them to digest. Doesn’t sound pleasant to me, but I’m not a heron. It takes a lot of feeding to raise the young. There are usually around five or six of them in the group. Many enemies can snatch the young if the parents aren’t watchful. These include: crows, ravens, raccoons, hawks, eagles, bears and snakes. The parents take their responsibility to care for the young seriously. The males spend about 10 and a half hours on the nest while the eggs are incubating. The females spend the rest of the time. Once hatched a parent is usually nearby while the other parent is hunting food.

Interestingly, fish is not the only thing on the menu. They also eat small rodents like mice, gophers and voles, frogs, snakes, insects, baby turtles, as well as other smaller birds.

After about 80 days the young are ready to leave the nest to fend for themselves.

The scientific name of the Great Blue Heron is Arden  herodias.


Heron Catching and Eating a Catfish:

I can’t help but be amazed at how much care God put into designing these birds and giving them the ability to catch their own food and build huge nests out of sticks. He provided everything they would need to survive and help maintain the balance of the ecosystems where they live. If He cares for them, He surely is able to care for us.

More Pictures Around Spring Lake:


Another Beautiful Blue Heron:

Another near relative of the Great Blue Heron is the Little Blue Heron. It has a more purplish hue and more vivid light blue on its face. Below are a couple pictures of these birds capture in pictures at the same place as the Big Blue above. Notice the Bull Frog that the bird is eyeing. He better watch out or he will become lunch!

If you want to learn more about herons, you can do research by reading about them. More fun, however, is to spend some time out watching them for a few hours. Take a pair of good binoculars and you can see a lot more of the action. Be prepared, however, to wait patiently. Why not take a fishing pole along and do some fishing while you wait. See if you can out-fish the amazing herons. 

Blessed Bees

Some of the most important creatures that benefit man are the bees. Besides the honey that they produce, what other benefits do we get from the bees? What lessons can we learn about these interesting creatures God created for us to enjoy?


Click below to open Powerpoint presentation. You can also open it in Keynote, if you have that app.

blessed-bees-chapel

Four Lessons From the Plant World

Have you ever noticed how many times the Bible refers to plants to teach us important lessons? In this presentation we will learn about some plants and how they can help us remember some important truths from God’s Word. Hope you enjoy this presentation.


Click below to open the Powerpoint presentation. You can also open it in Keynote, if you have that app. four-lessons-from-the-plant-world-chapel

Seahorse Roundup

Have you ever seen a seahorse? What kind of animal is it? Is it really a horse? Is it a fish? Read this blog post to find out many interesting things about these amazing little creatures God created for us to enjoy. They can teach us several important lessons about life.

Click below to see the Powerpoint presentation. You can also open it in Keynote, if you have that app.

seahorse-chapel