
Are You A Cat Person?
Many people love cats. I have had a few as pets and many of my friends have them. Personally I prefer other pets that don’t shed fur all over the place. But that’s just me. One kind of cat that I don’t mind having around is one made out of paper. Would you like to learn how to make an Origami bobblehead cat? If so, here is what you need:
Get a sheet of two sided paper. Be sure one side is white. Most Origami paper comes this way. You will need two squares of paper. You can decide how big of a cat you want to make by the size of the squares of paper you choose. A good size to start with is one 6 inch square. Your second square should be one fourth the size of the first one.

Let’s Begin With The Body:
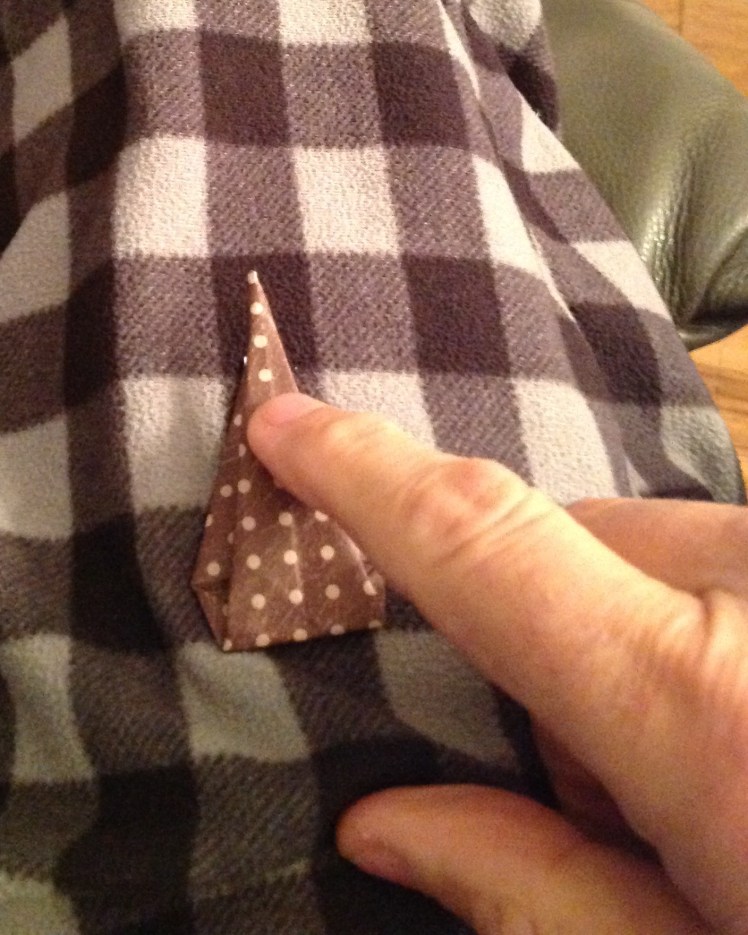
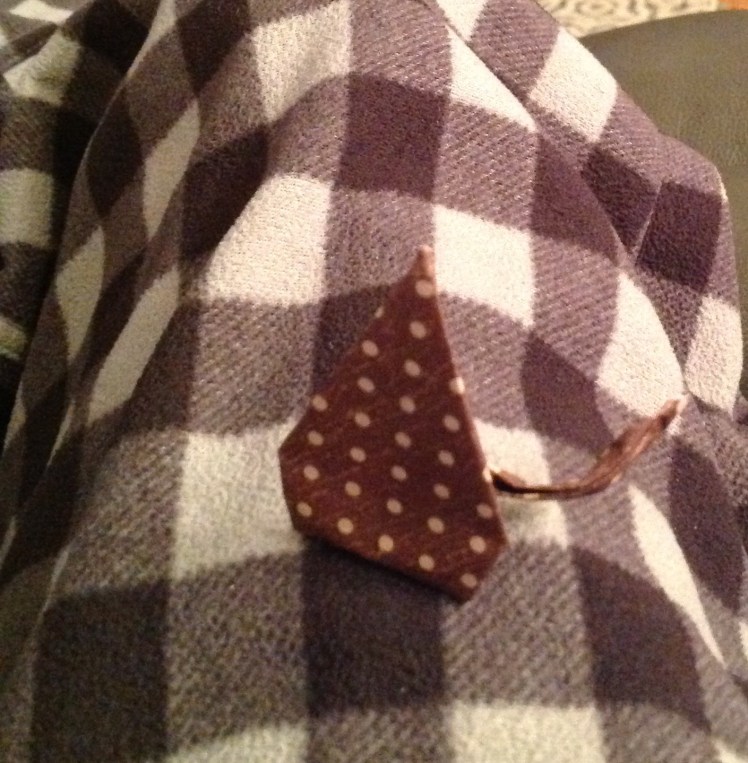
Turn the paper so it looks like a diamond and fold an airplane Point at the bottom.
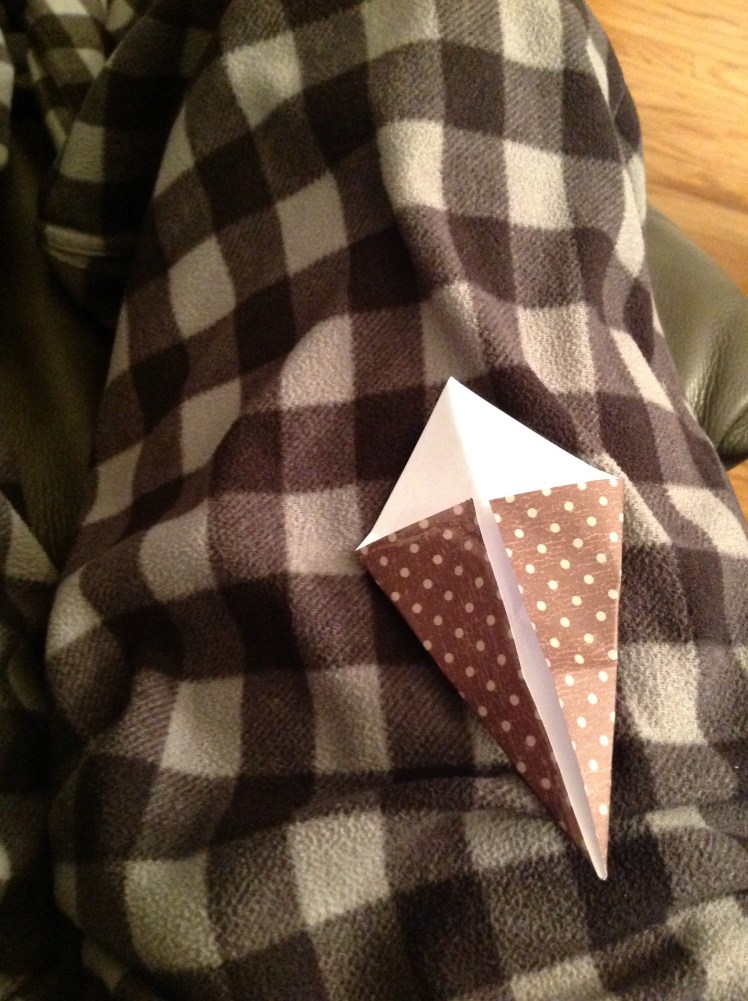
Repeat at the top so it overlaps the bottom.
Let’s fold the thicker end skinnier so it will add weight to the bottom and represent a narrow tail. Just make another airplane Point to reduce its size.
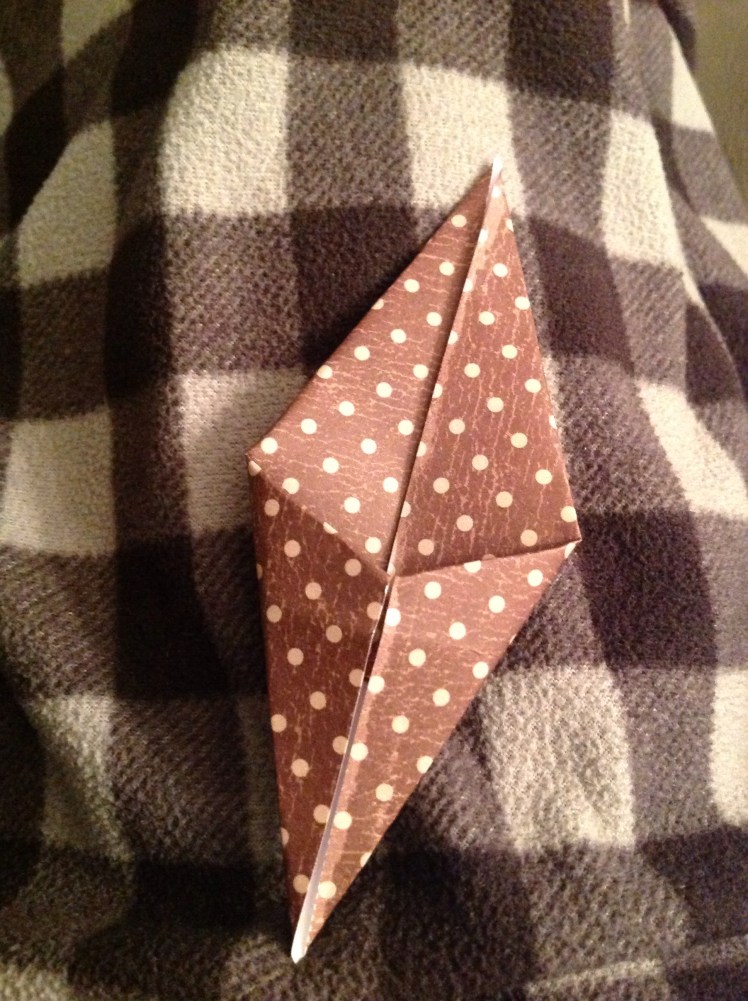
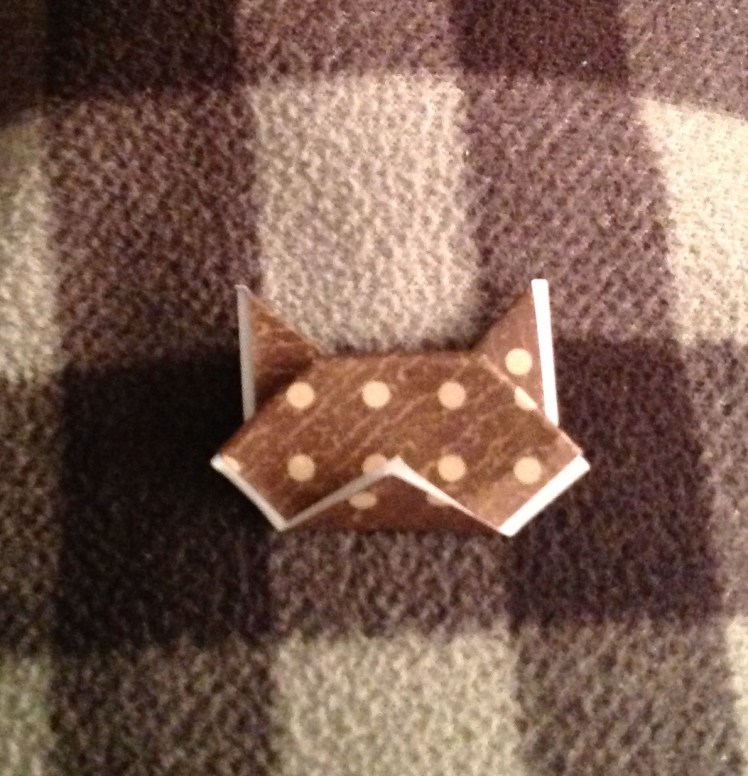
Form the Body and Tail:
Next fold up the tail section so it goes up higher than the larger end.
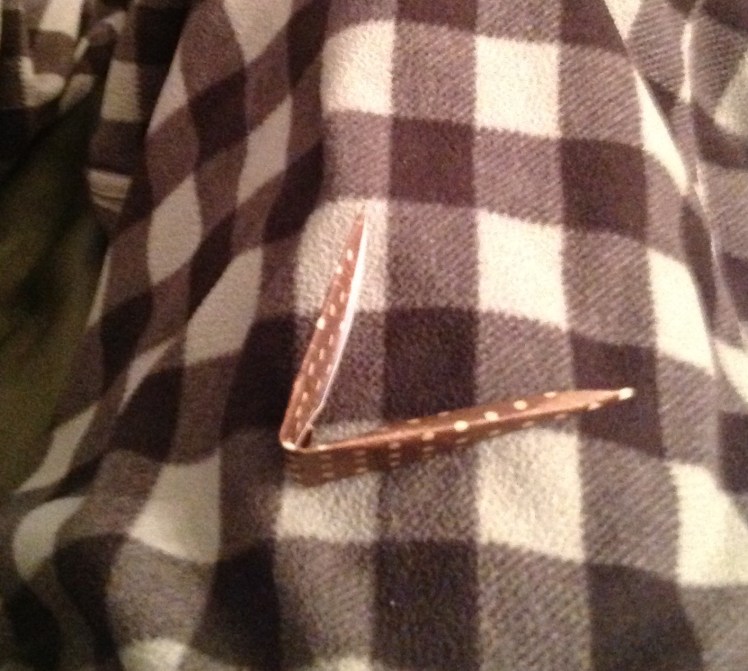
Above is a side view.
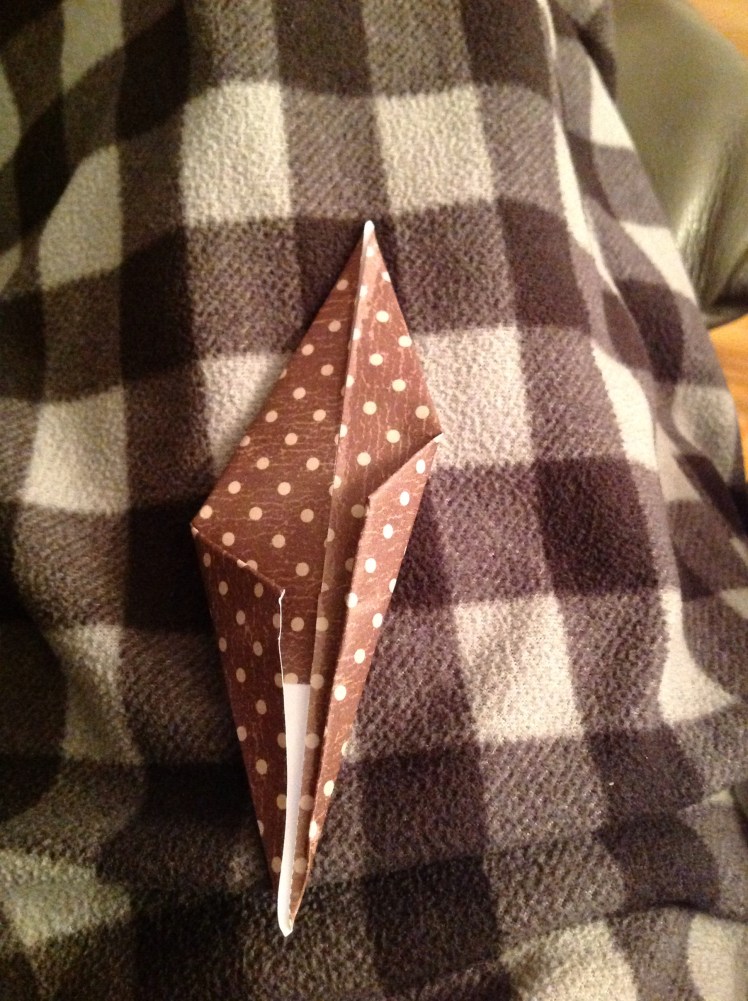
Let Your Finger Be Your Guide:
Place your finger up against the body portion and then fold the tail portion parallel to your finger.
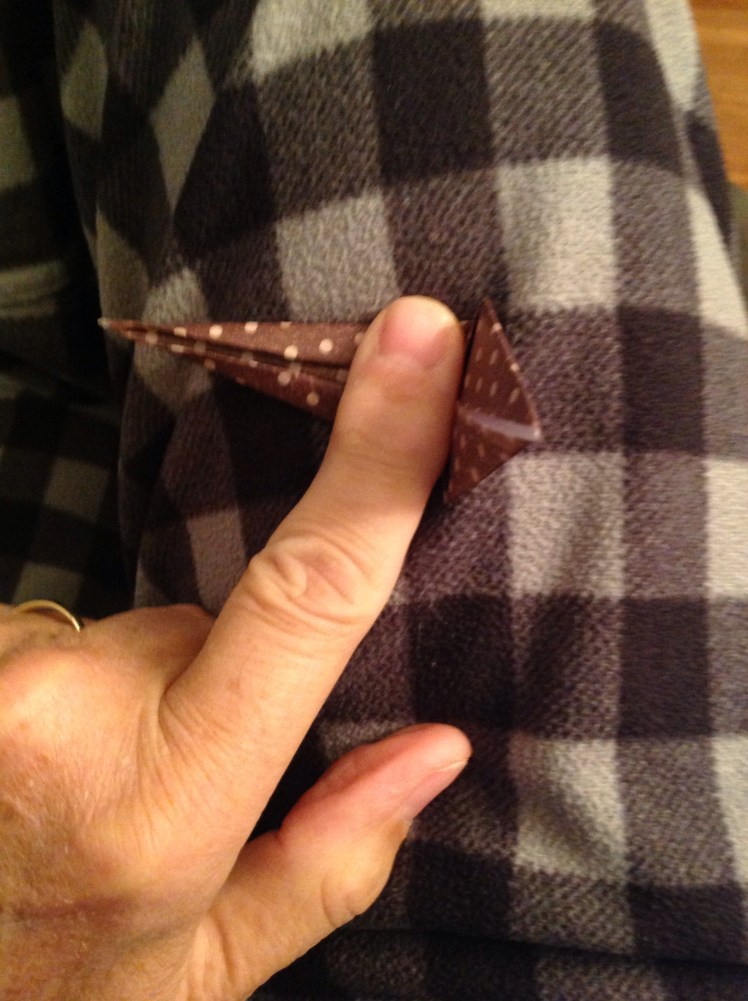
Next, let’s fold the tail in half again to make it even skinnier.

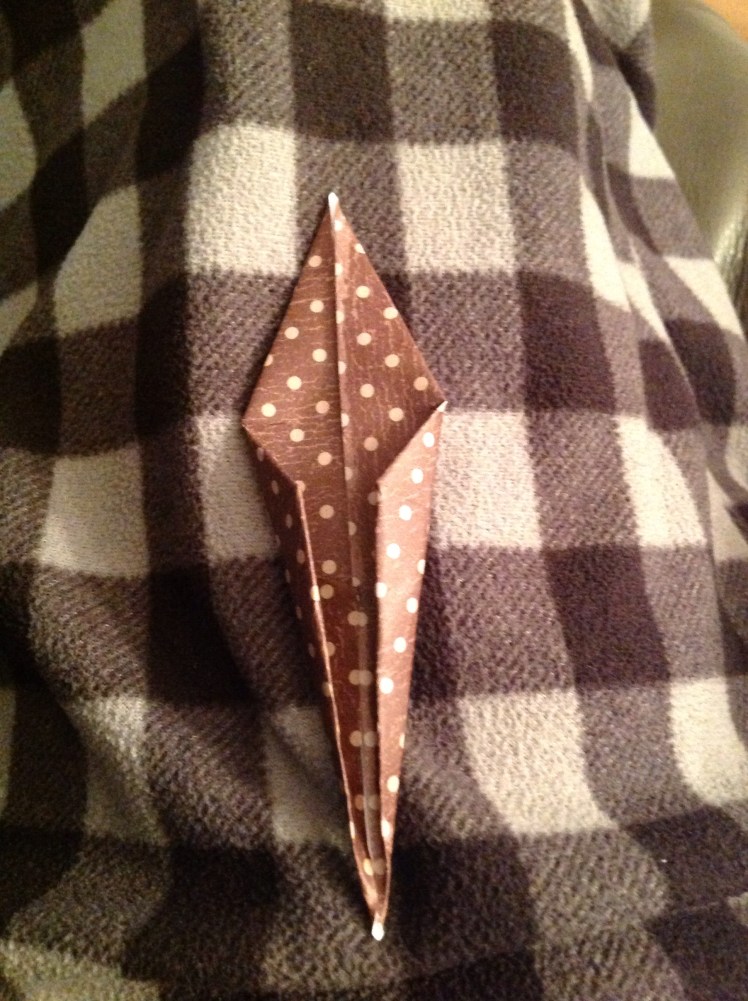
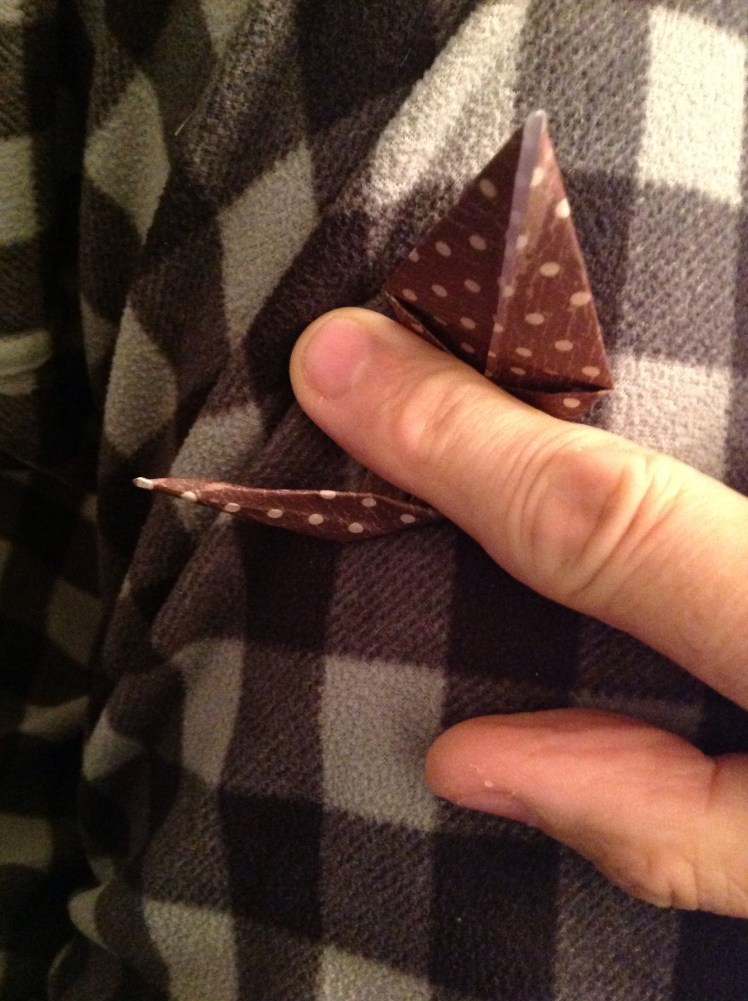
Give Your Cat Some Character!:
Wrap the end of the tail around your finger so it looks like the cat is waving its tail.
Now We Need A Head.
Take your smaller square and begin with the white side up in the diamond position. Fold the top down to the bottom.
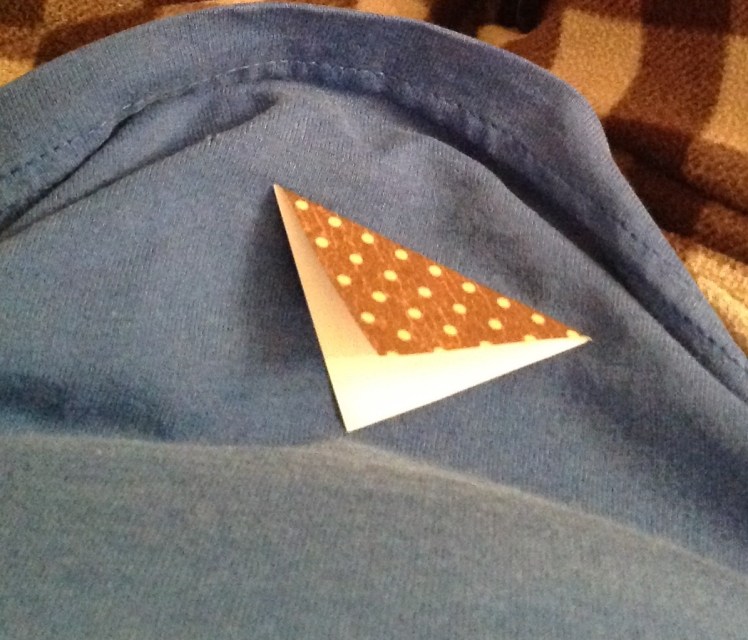
Fold the right hand side to the bottom and repeat on the left.

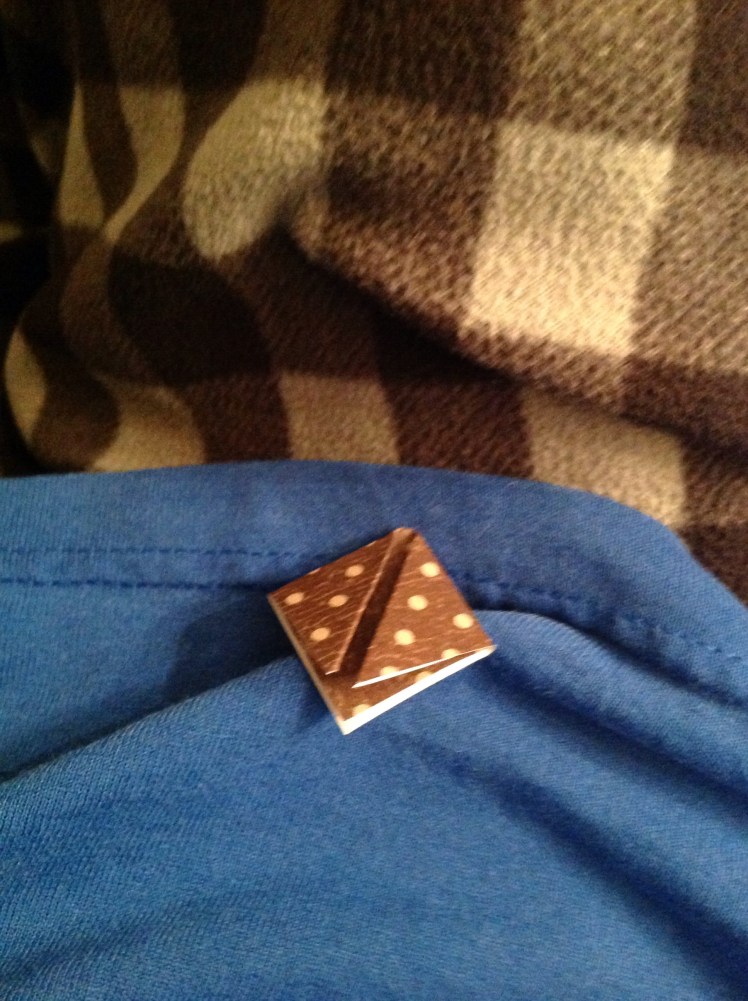
Fold down the top just a little ways to form the top of the head.

Then fold up the ears on the left and right side so they extend beyond the top of the head. You should fold them so they go tight against the sides of the triangle at the top of the head.
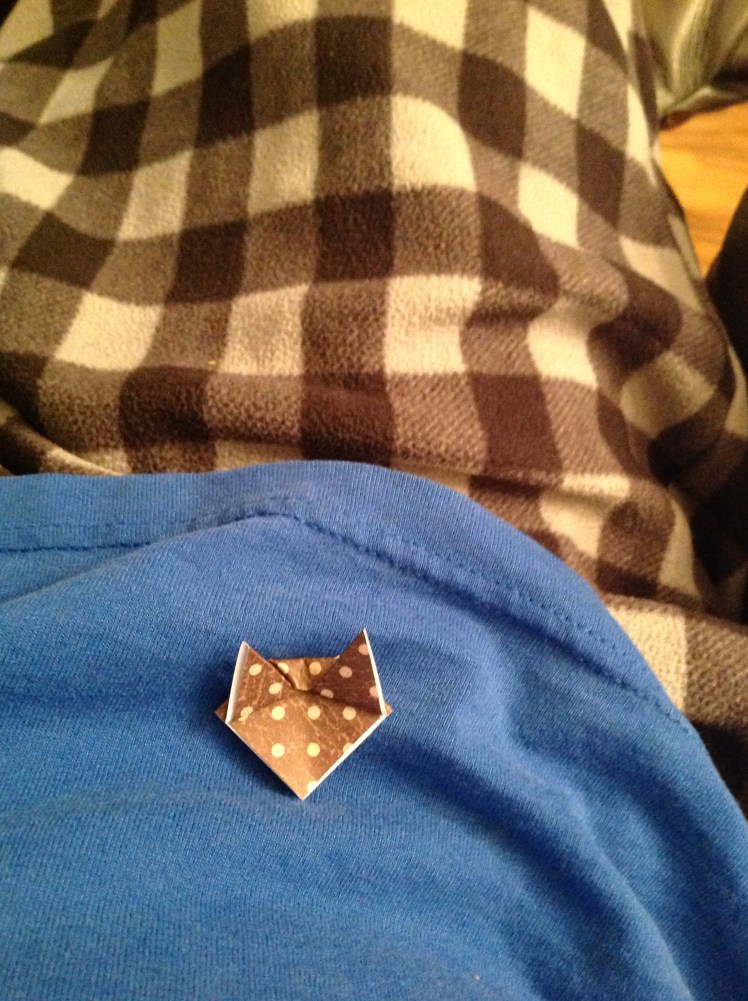
Turn the paper over. Next fold up the bottom chin portion about three quarters the distance from the top. Tuck the back portion inside the head and then fold down just the top part of the white triangle to form the nose.

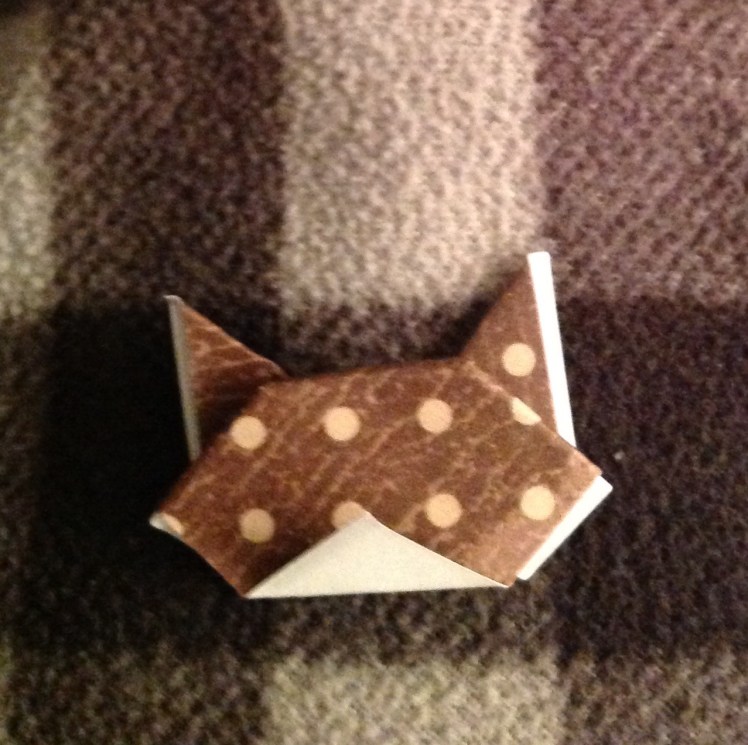

Bend the ears forward against the sides of the head. Next, open the ears with your finger so the white inside shows.
Some Assembly Required:
Now that you have made the two parts of the cat it’s time to put them together. Before placing the head on the neck it’s best to bend the two cheek portions away from you so the middle crease stands out. Then place the head on the body. Notice that there is a slot on the back between the ears in which to insert the neck. You can bend the head to any position you want to give the cat the desired look. If you make smaller versions they can be kittens. Usually kittens have bigger heads than adults in relation to their body size.
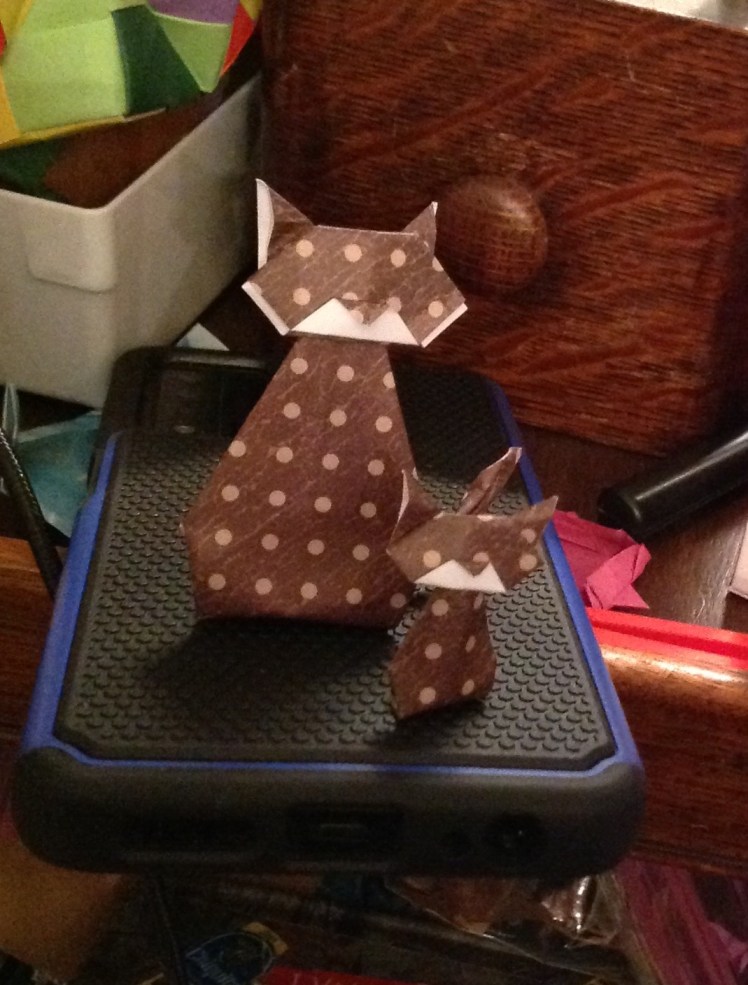
You Can Use A Penny to Balance Your Cat.
Interestingly we discovered that the cats have a tendency to fall forward. There are two ways to prevent this. One is to bend the body backwards at an angle. The other is to slip a penny inside the base of the cat. If that doesn’t work, you can also glue them to a piece of cardstock or a box top.
Add A Message:
It is fun to make several cats and give them away to friends. To make it better add a message like: “You are the cat’s meow.” Or...”You Are A Prrrr…fect Friend.” I’m sure you can think of even better messages.
Make It Better!:
Interestingly this Origami project was made from another. I once found directions for folding a cat in a book I checked out of the library. I liked the head but I thought the body portion could be improved, so I created my own. Don’t be afraid of experimenting with Origami models. That is how many new folds were discovered. Modifying a basic pattern can lead to many interesting creations.
Evidence of Design:
Just look at God’s creation and notice the variety that can come from a basic design. Take birds as an example. Some birds have longer legs and longer beaks than others but they are still birds. When God created the various species He gave each just what it would need for where it lives and what it eats. Design has function. No matter where you look in God’s creation you can see evidence of intentional design.
Made for a Purpose:
Every time I see something that someone has created I think of just why it was made. Have you ever thought of yourself as a work of art created by a master designer? In the Book of Psalms in the Bible King David pondered this question and came to a conclusion. He said,
“I will praise You because I am fearfully and wonderfully made; Your works are wonderful, I know that full well.”
You can read the rest of his conclusions in Psalm 139. I hope you have come to the same conclusions when you look at yourself in the mirror. God created you for a purpose. He designed you so you could come to know Him and enjoy fellowship with Him through the gift of His only Son, Jesus Christ.
