This project is one of my favorites. I learned how to fold this ribbon several years ago when I was working as a children’s camp director in California. It was actually a 3rd grade student who taught me. After he showed me how to fold it I made one every week to give as an award for the cleanest cabin. Since then I have used them hundreds of times as encouragement awards to people who serve faithfully in helping others. I even made a huge ribbon that covered an entire bulletin board with its tails trailing down to the floor that said: “Give Him First Place in Your Life” to be used in my Bible classes. let me show you how to fold and glue it together.

This is the ribbon we are making.
Materials:
You will need four sheets of colored copy paper. Two of two contrasting colors. You will need to fold the paper diagonally to create two large squares from two sheets and two smaller squares from half sheets. Be sure you have one of each set the opposite color from the other one.
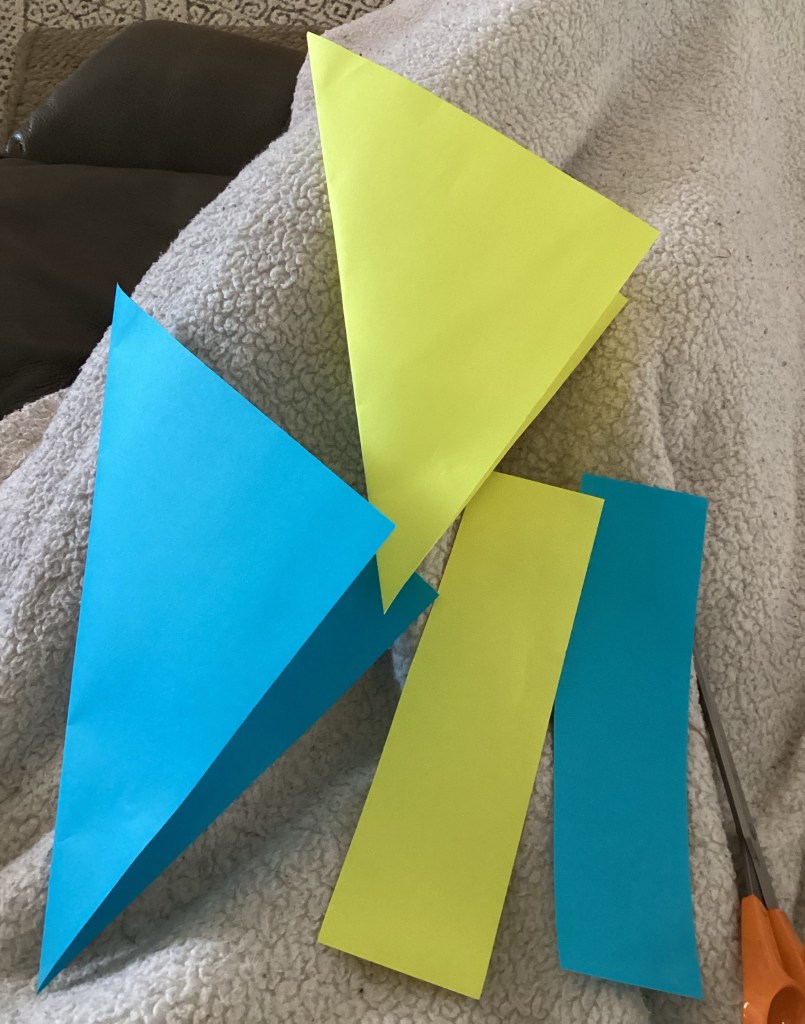
Pictured here are the two large sheet squares. Be sure to save the side pieces you cut off for the ribbon tails later.
Start each square with the pinwheel base. If you don’t know how to fold it you can Google it and see videos showing you how to fold it.
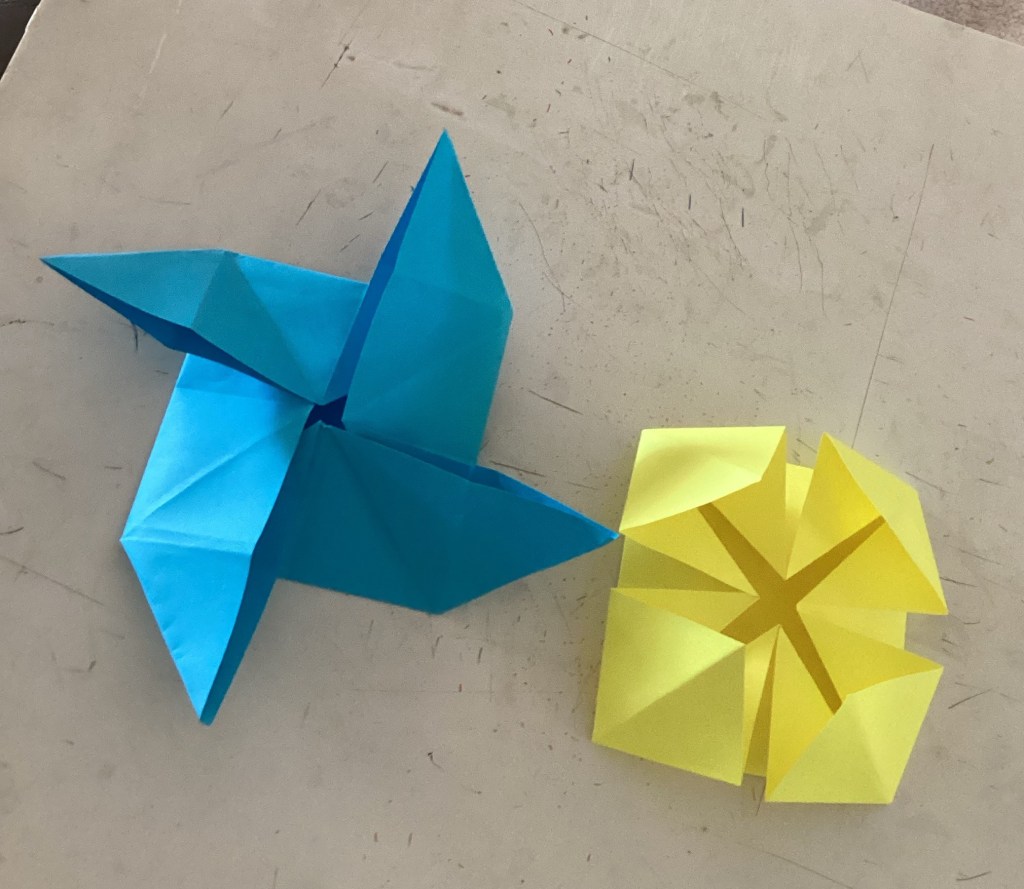
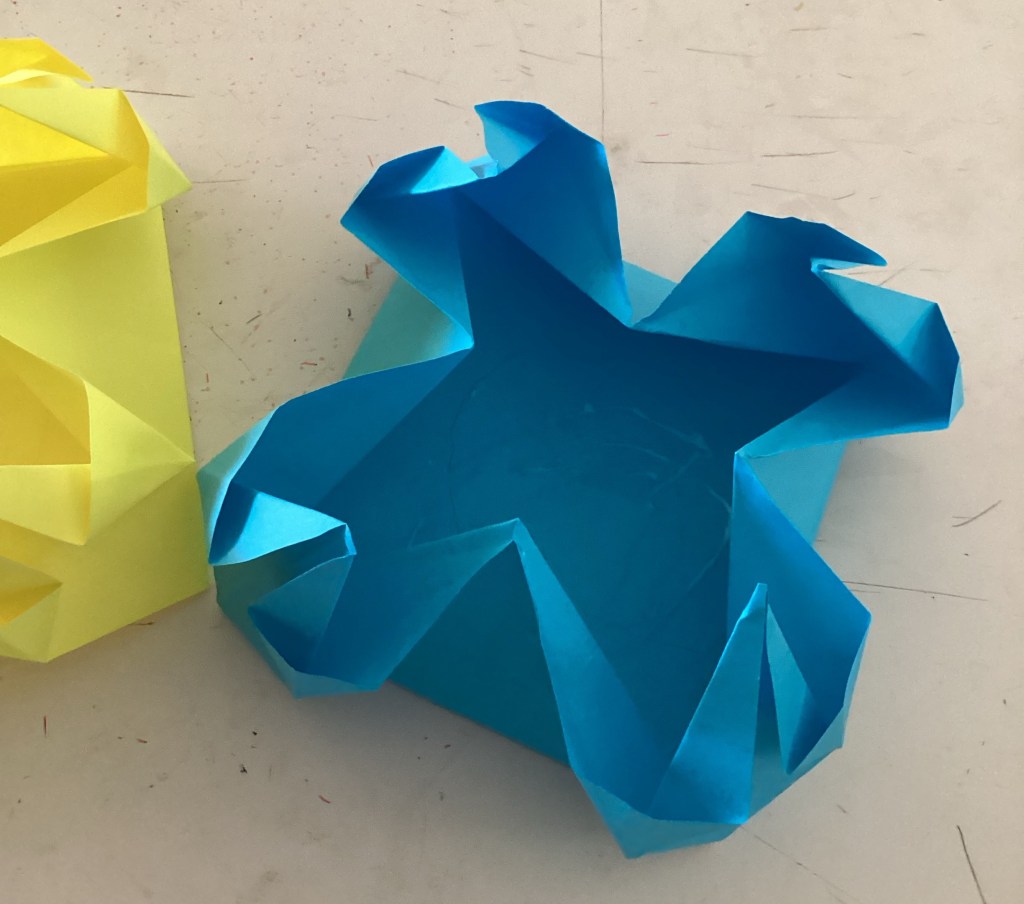
After you have made your pinwheel bases you will need to raise up the four points so that they look like a shark fin. Then press down on them to put the points in the center as pictured above.
Now you need to fold airplane points on each of the four corners. Remember to fold the points to the center of the target like you are shooting arrows at the bull’s eye.
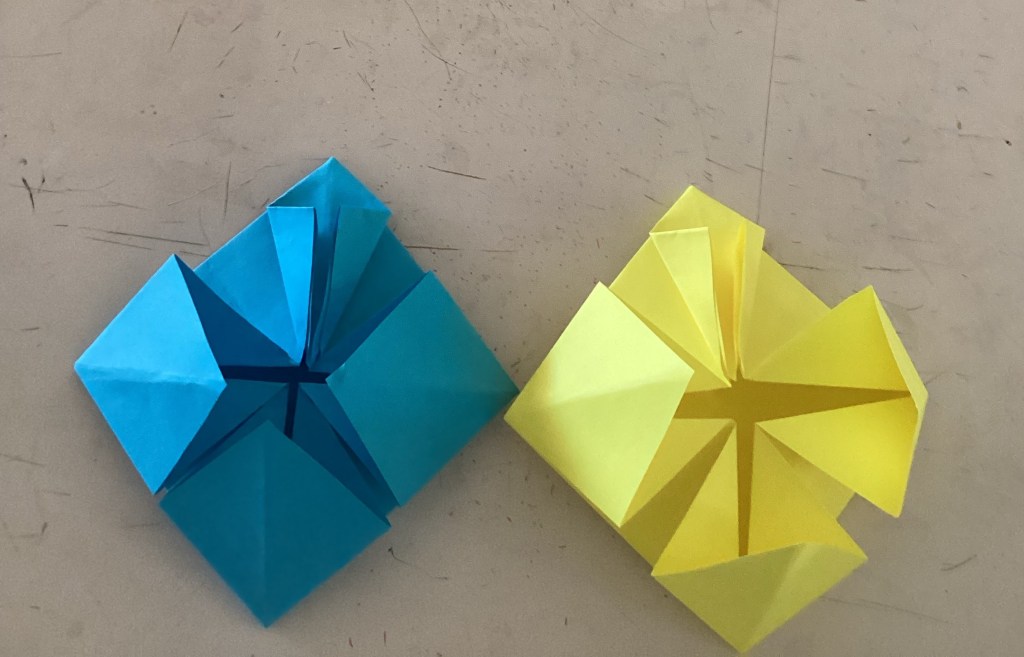
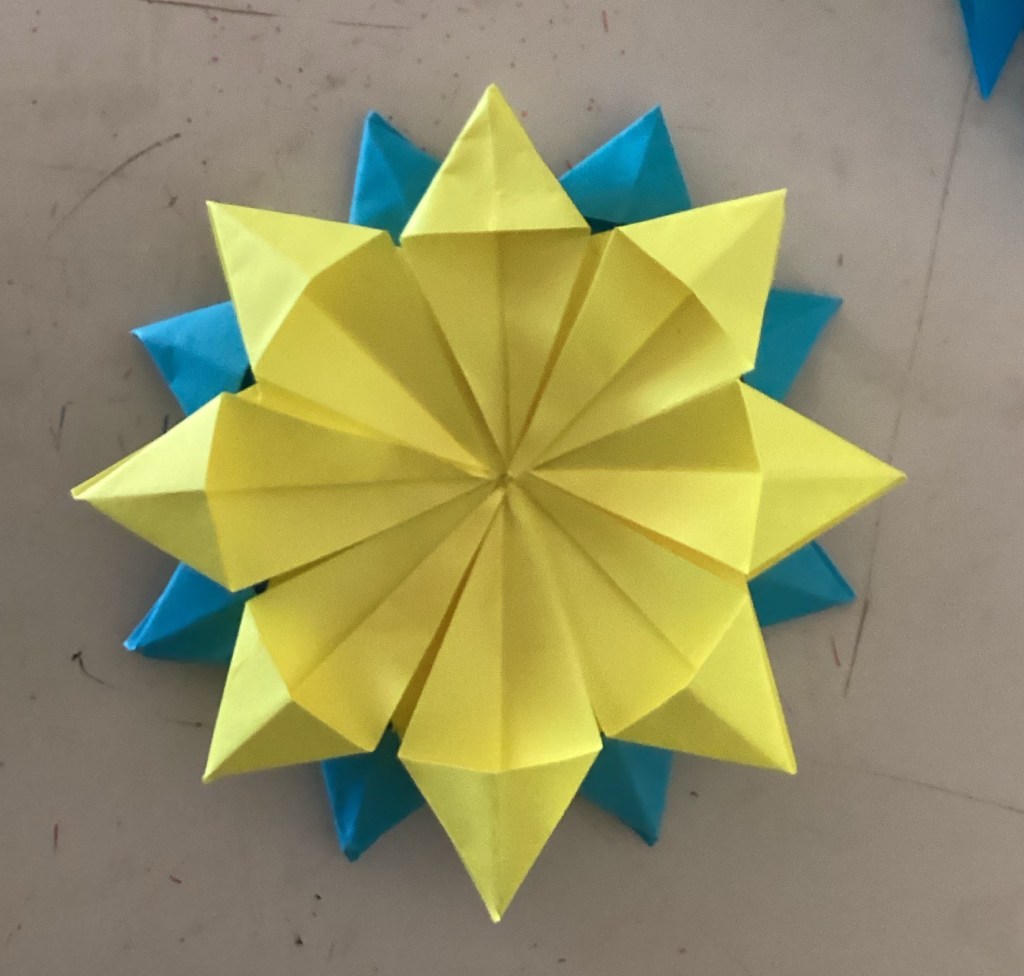
Next, you will raise the tiny shark fins and press down on their tops to form the points of the circular flower shaped top portion. Be sure the crease lines line up with the grooves beneath them for a well formed Star.
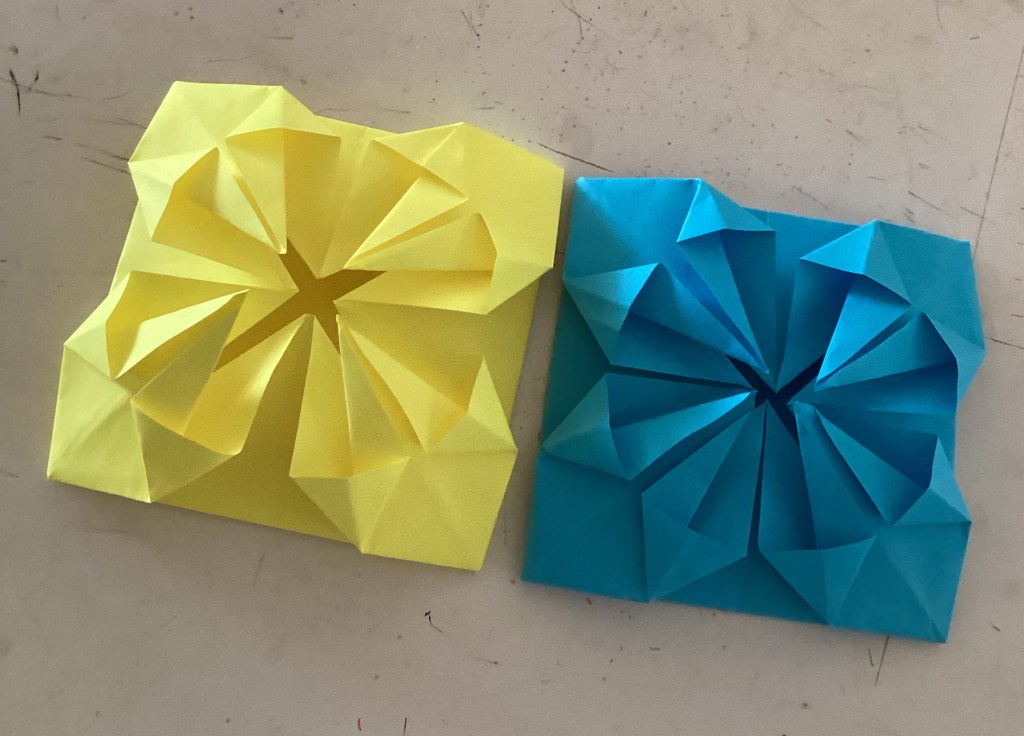
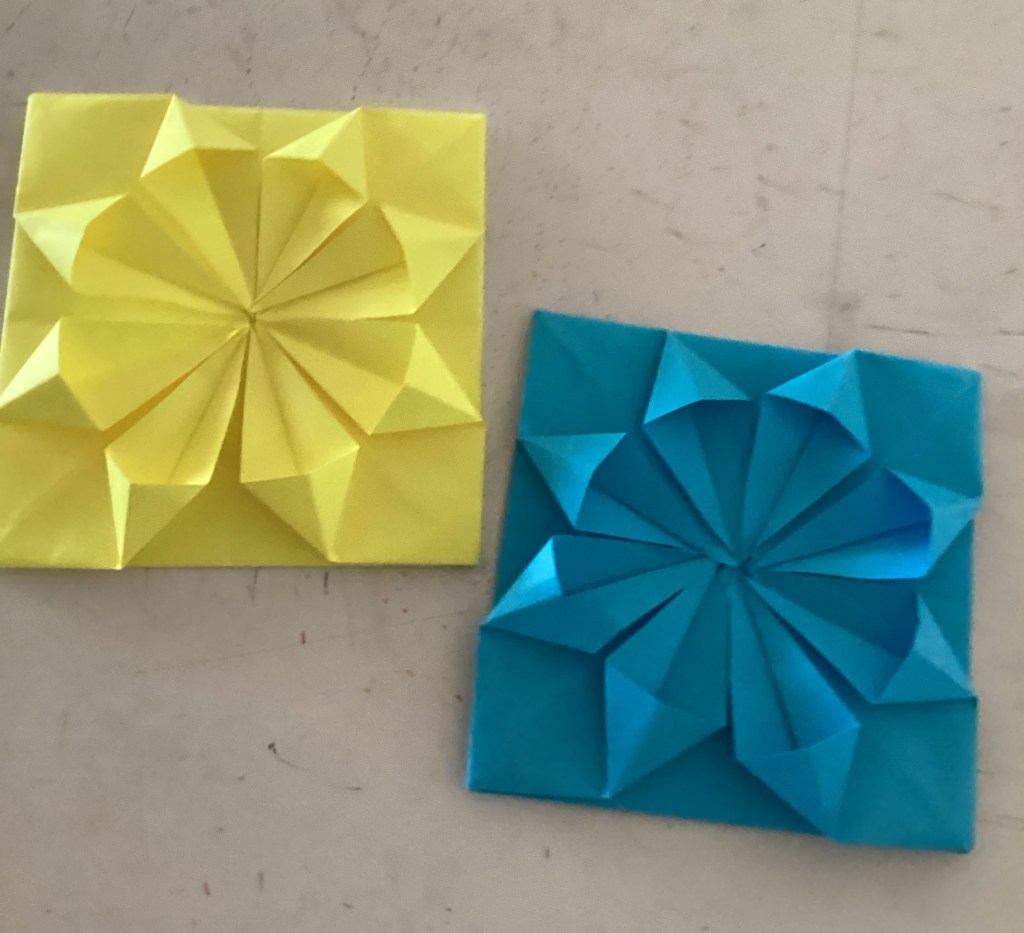
This should be what each of your pieces should look like at this point.
Gluing Instructions:
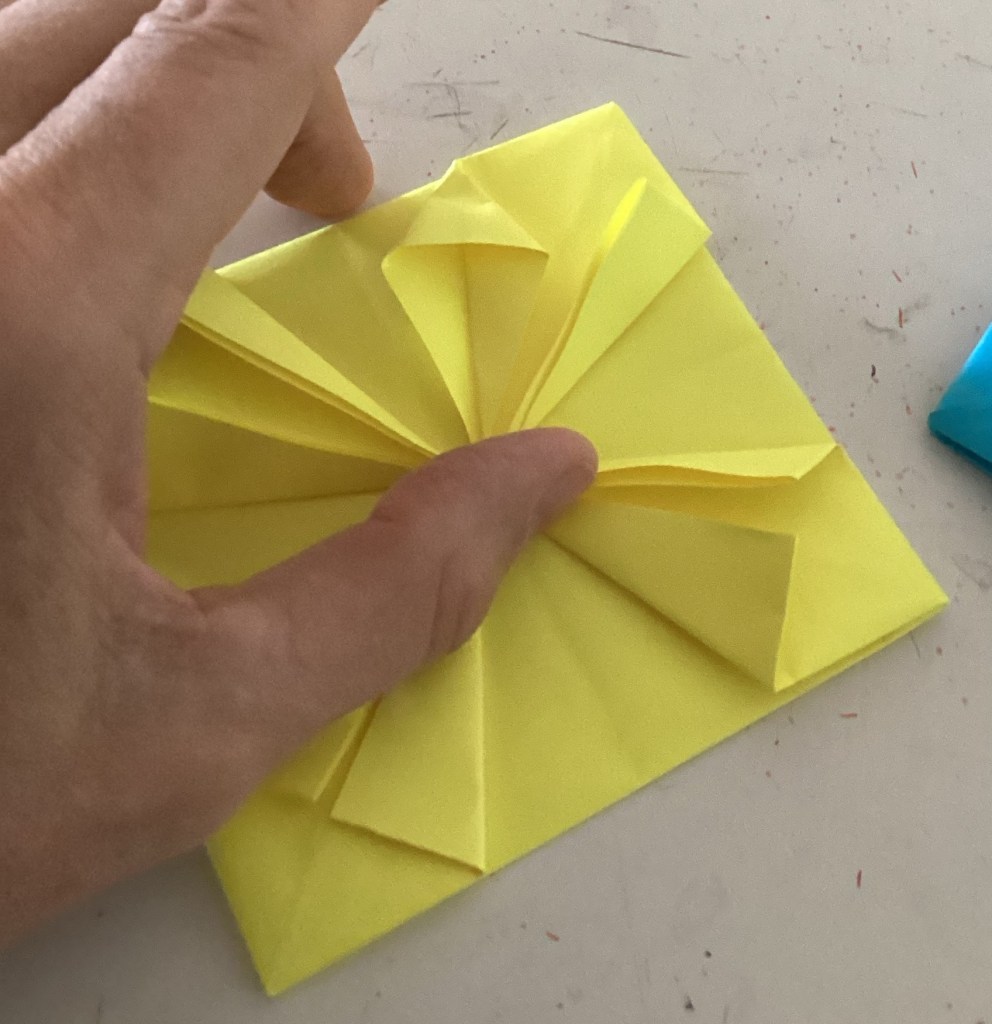
In order for the piecework to hold together when we cut away around the rims we need to be sure to glue it in the right places first.
Open up the middle and make a circle of glue inside. You only need a little glue or it will leak out or take a long time to set up. After the glue is applied press down on the top until the glue sets. Next, put a drop of glue under the four points pointing toward the center and press down to secure them.
You are now ready to do the cutouts.
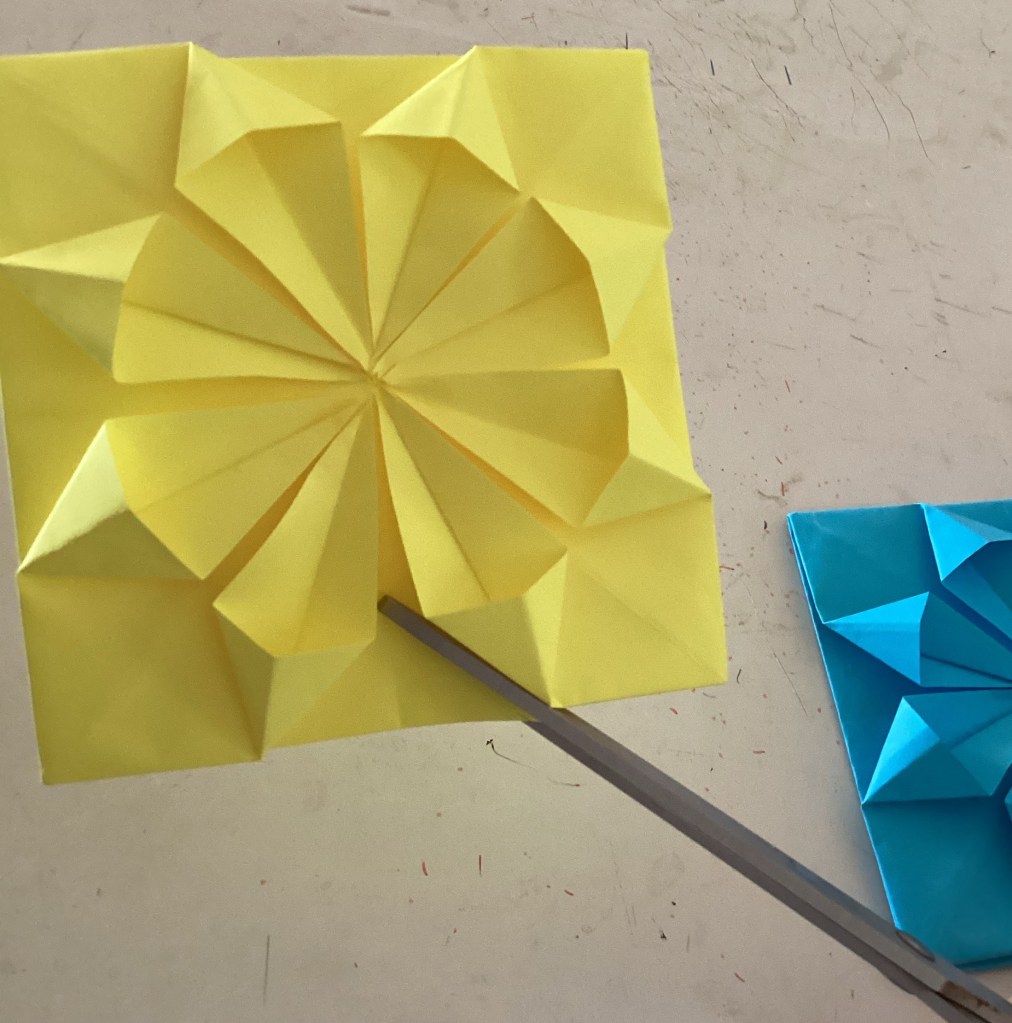
Cut out the triangles between the points of the Star. If you hold the scissors at an angle they will undercut so that the edges of the points are even. Be careful not to cut the creases forming the sides of the points. You just want to remove the paper on the bottom portion that is between the points.

Aren’t these pretty little stars.
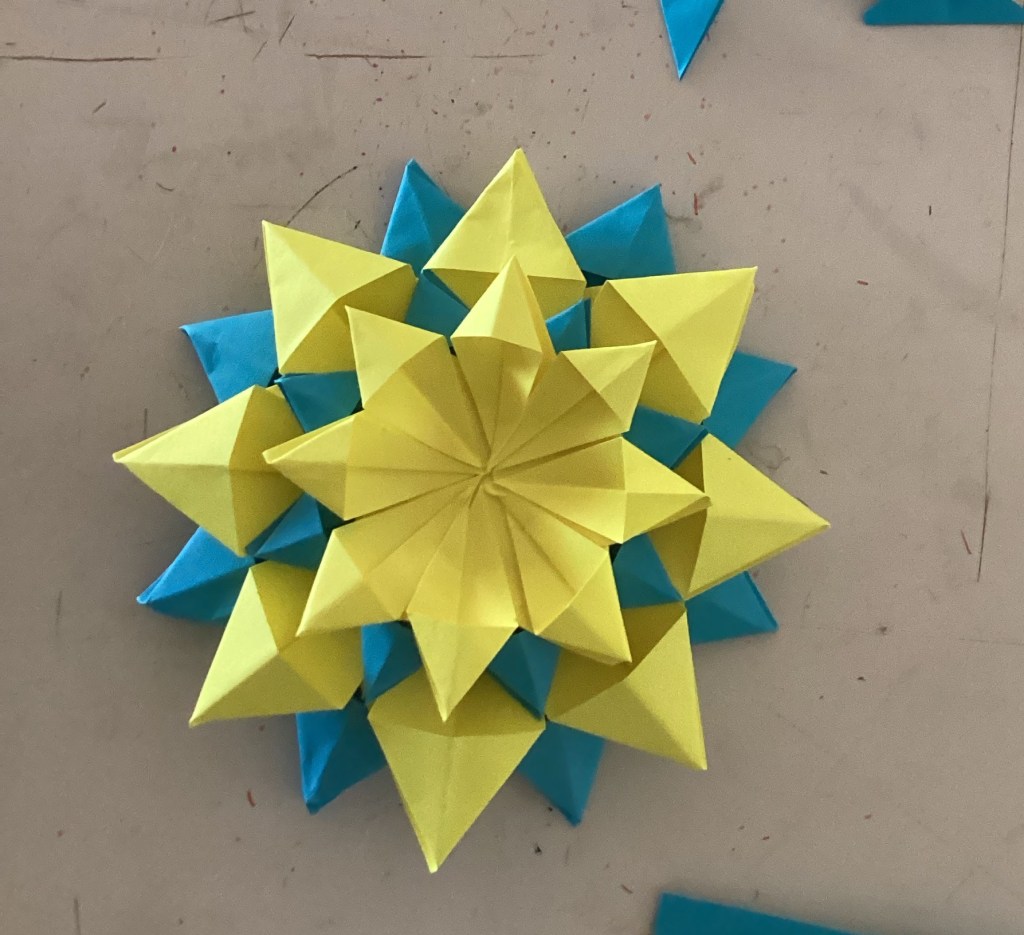
Next, we will stack the stars so that the colors alternate and that each star under the others is placed between the points of the other star. This way you will be forming two 16 point stars.
You should now have two stars. One is twice as large as the other. Place the smaller stars in the middle of the larger one so it looks like the following picture.
Next, take out a small coin like a penny and trace around it on one of the pieces you cut out between the points earlier, cut it out and glue it in the center to create a button.

Next, we will create the trailing ribbons. That you see in the picture.

Take two side pieces you cut off at the beginning of the project and fold them in half vertically.
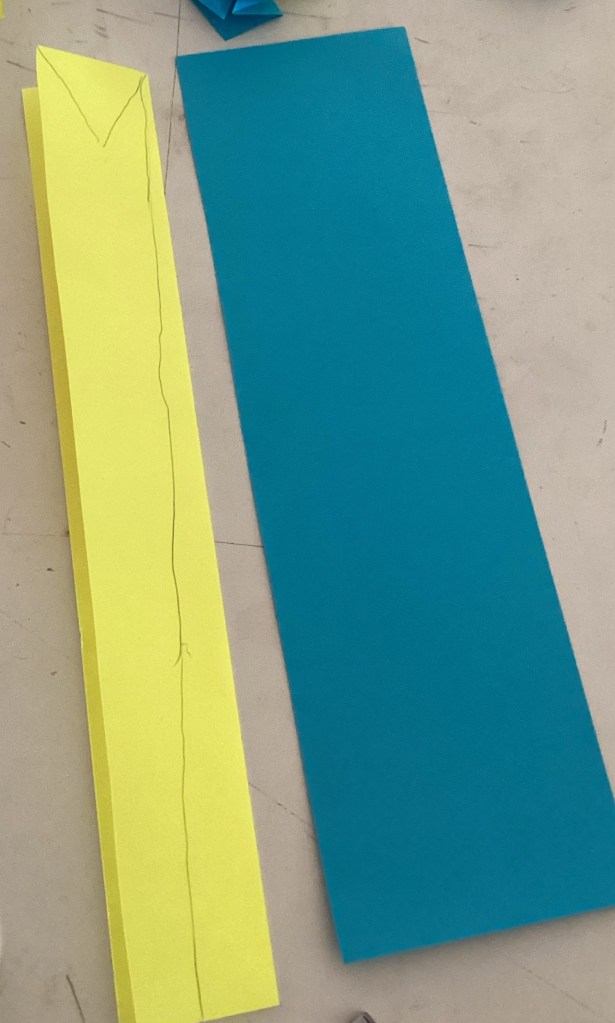
In one end of the strips cut a V shape. Then cut a diagonal line down the creased side keeping the end with the V the wider than the other end.
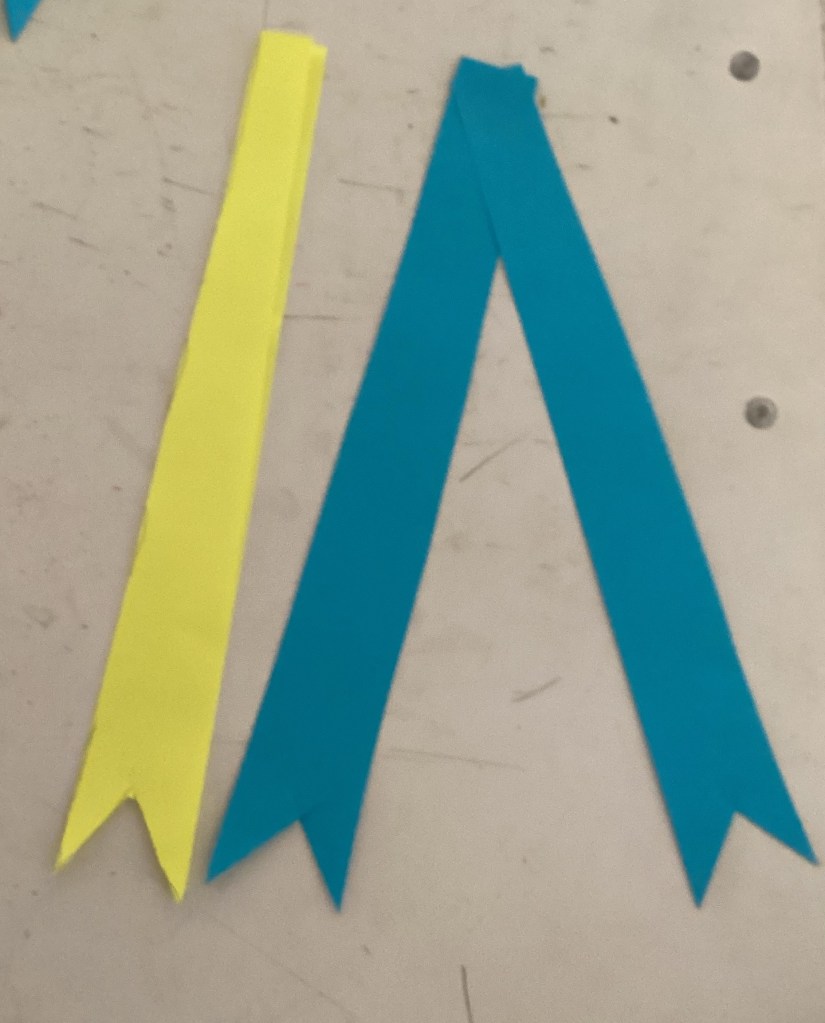
Glue two of the strips together as shown in the picture. Then take the other two and cut them in half to shorten them. Then glue them so that they overlap the larger ones right in the middle of the V’s.
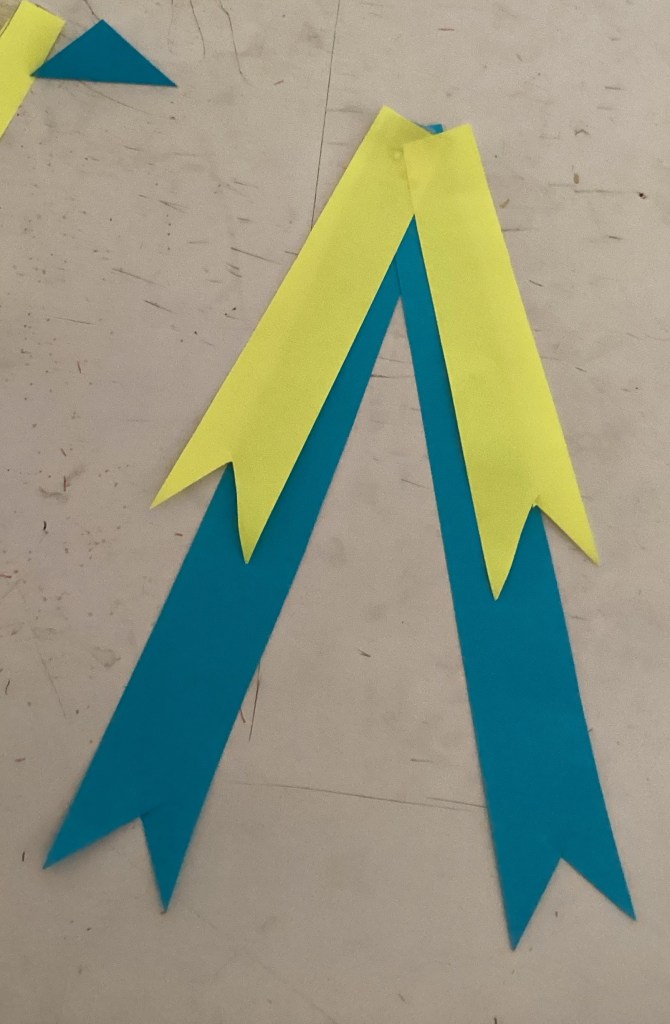
Does yours look like this?
Now we will glue these tails under the stars on top like the following:
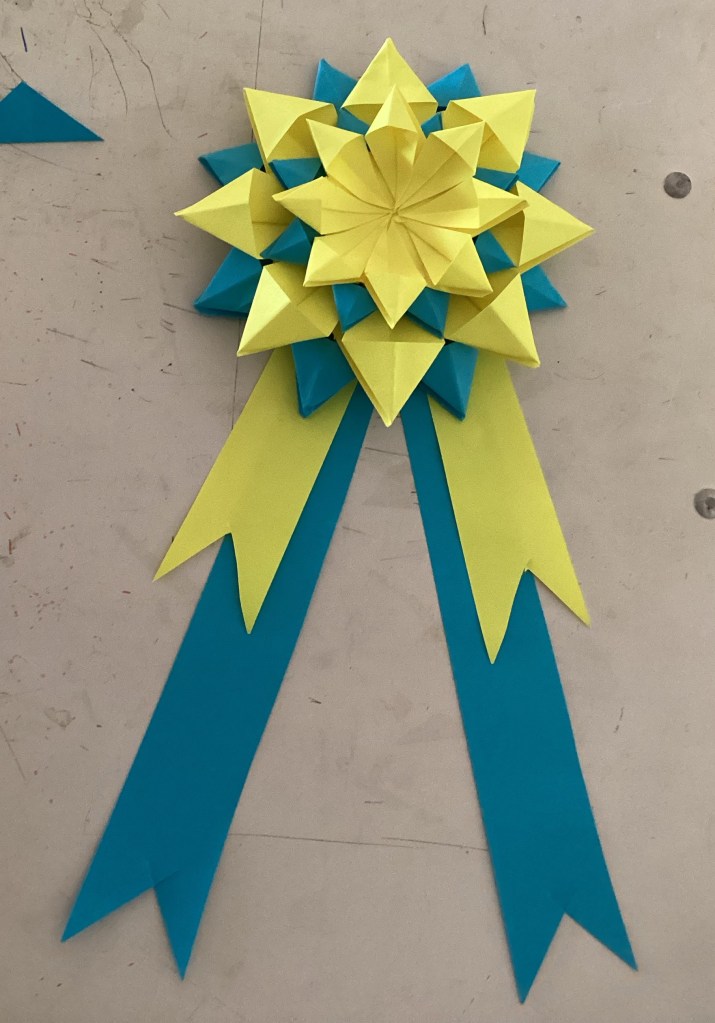
The penny button goes in the center of the top star.
Now let’s make the ribbons more intricate by adding dots. Use the scrap pieces and a hole punch to make several dots. Then glue a dot in the middle of each of the points of the stars.
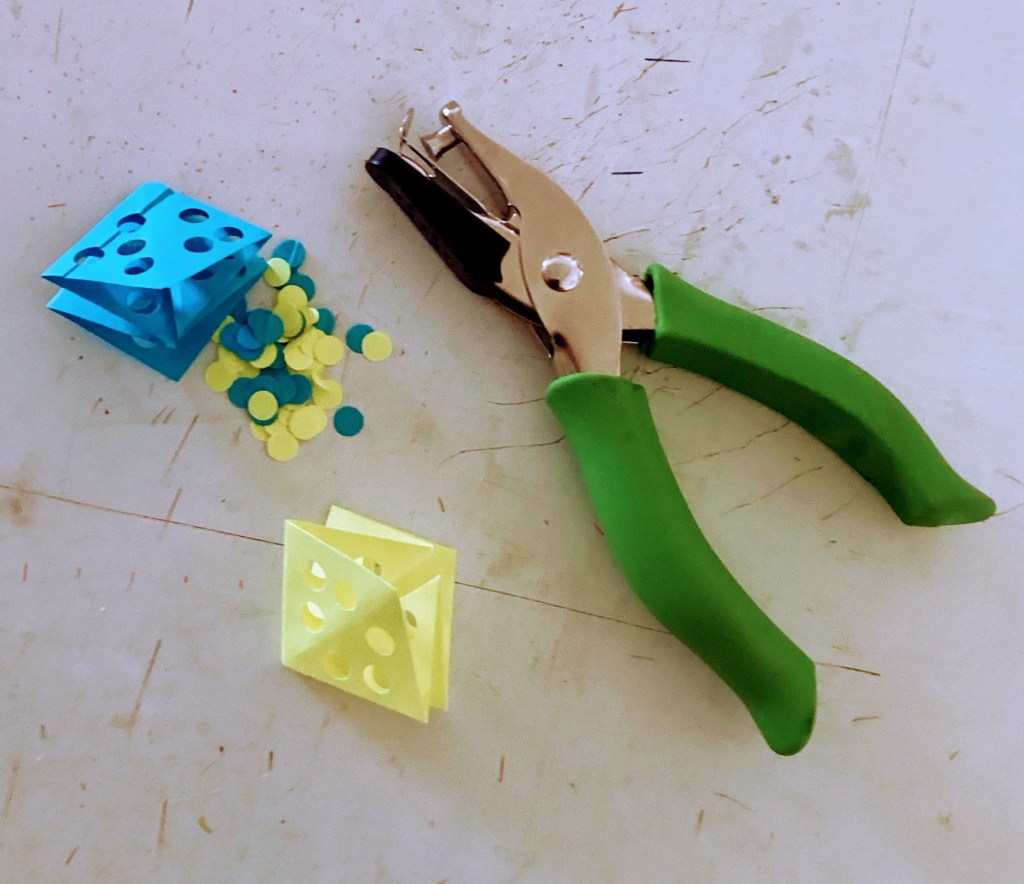
HINT: Punching through several layers is easier than punching one at a time!
The finished ribbon:
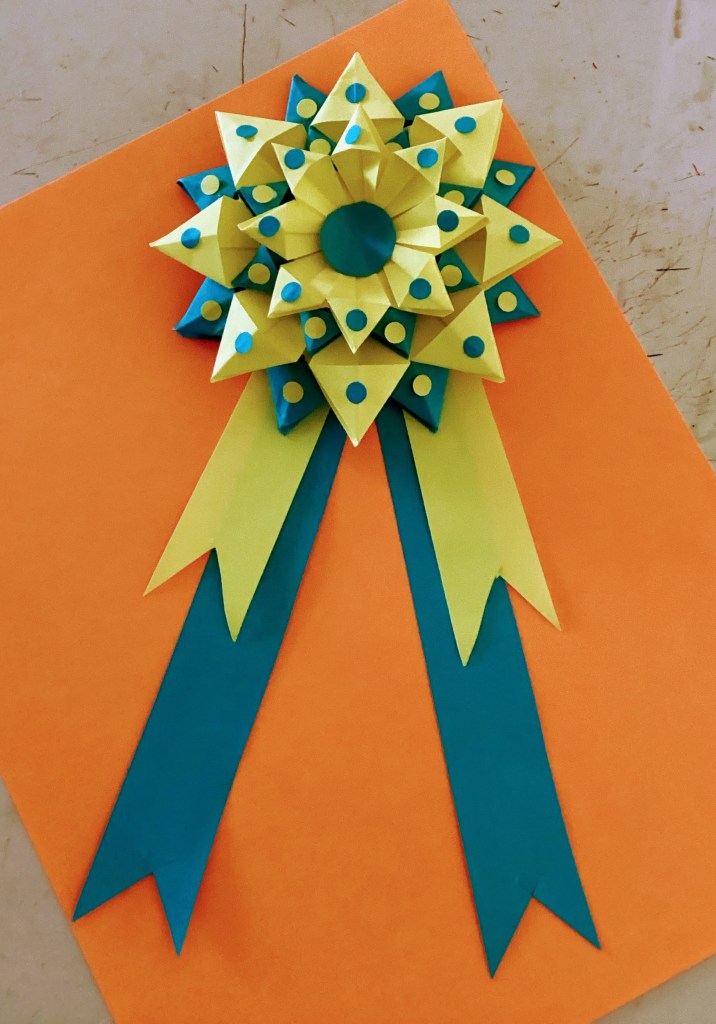
Now you are ready to give an award away or keep it yourself to show you have become an excellent origami folder.
Creative ways to use the ribbons.
Each year in my art classes I have the students make award ribbons to use as ministry projects. I have each student think of someone who ministers to them faithfully and to even consider those who do it behind the scenes where nobody notices them. They then type out little labels to glue to the tails telling the persons they are giving the ribbons to what they appreciate about them. I am amazed at how effectively these paper gifts are in encouraging others. Some have given them to their teachers, mothers and fathers, pastors, the lady that does the flower arrangements at church, brothers and sisters, and many others.
For whom are you thankful?
My most favorite award ribbons was the one I made for Jesus. It was the one I mentioned at the beginning of the post that I used in my Bible class.
Colossians 1: 15-17.
“He is the image of the invisible God, the firstborn of all creation. For by Him were all things created, in heaven and in earth, visible and invisible, whether thrones or dominions or rulers or authorities- all things were created through Him. And for Him. And He is before all things, and in Him all things hold together.”
Well, I hope you have enjoyed learning how to fold award ribbons. I hope you, like I, have come to know the Creator and Sustainer of all things. He surely deserves an award and our love and gratitude.
